This Halloween, I’m ditching the usual ghostly cookies and opting for something handheld, fun, and just a little bit spooky. Cake pops are perfect for that—they’re versatile, playful, and easy to customize with colors and surprises inside. Plus, they make a mess that’s totally worth it.
Why I keep coming back to these Halloween cake pops
They’re endlessly customizable, and each batch feels like a little ritual. I love the chaos of melting chocolate, the anticipation of dipping, and the surprise of what’s inside each one. Plus, they’re a hit at parties, sparking smiles and conversation. This recipe is my fallback when I need a sweet project that’s both fun and slightly unpredictable.
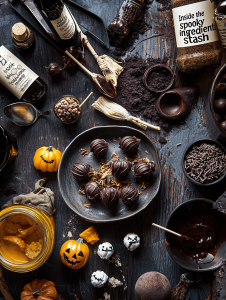
Inside the spooky ingredients stash
- Cake crumbs — I use day-old sponge, but crushed cookies work too. It’s the base that holds everything together.: Crumbs form the core and need to be moist enough to roll into balls but not sticky.
- Chocolate — Dark, milk, or white, melted smooth. It’s the magic shell and glue.: Silky, melts easily, and sets firm with a shiny finish.
- Surprise fillings — Mini candies, flavored syrups, or even a dollop of jam. Keep it fun and unexpected.: Adds a hidden burst of flavor or texture inside.
- Decorations — Sprinkles, edible glitter, tiny candies. Make it festive and spooky.: Visual appeal and extra crunch or shimmer.
- Cake pop sticks — Wooden or paper, sturdy enough to hold the weight.: Transforms treats into handheld moments of joy.
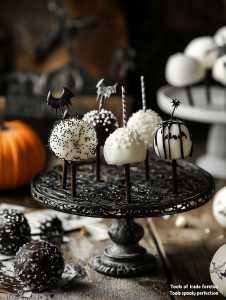
Tools of the trade for spooky perfection
- Double boiler or microwave: Gently melts chocolate without scorching.
- Spoons or piping bag: Doles out chocolate precisely and neatly.
- Cake pop sticks: Turns each treat into a handheld bundle of fun.
- Parchment paper: Prevents sticking and keeps pops neat.
- Cooling rack: Allows excess chocolate to drip off and cool evenly.
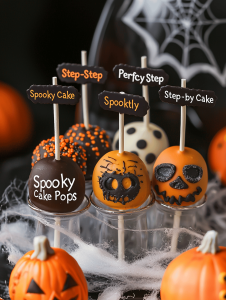
Step-by-Step for Perfectly Spooky Cake Pops
Step 1: Start by melting your chocolate in a heatproof bowl over a double boiler or in short bursts in the microwave, stirring between each. Aim for smooth, glossy consistency—if it’s dull or grainy, keep warming gently.
Step 2: Use a small spoon or piping bag to dollop a bit of chocolate into each cake pop cavity, then add a hidden surprise like a mini candy or a splash of flavored syrup before sealing with more chocolate.
Step 3: Insert a stick quickly, twisting slightly to secure, and gently tap off excess chocolate. Place on parchment to set in the fridge for about 30 minutes.
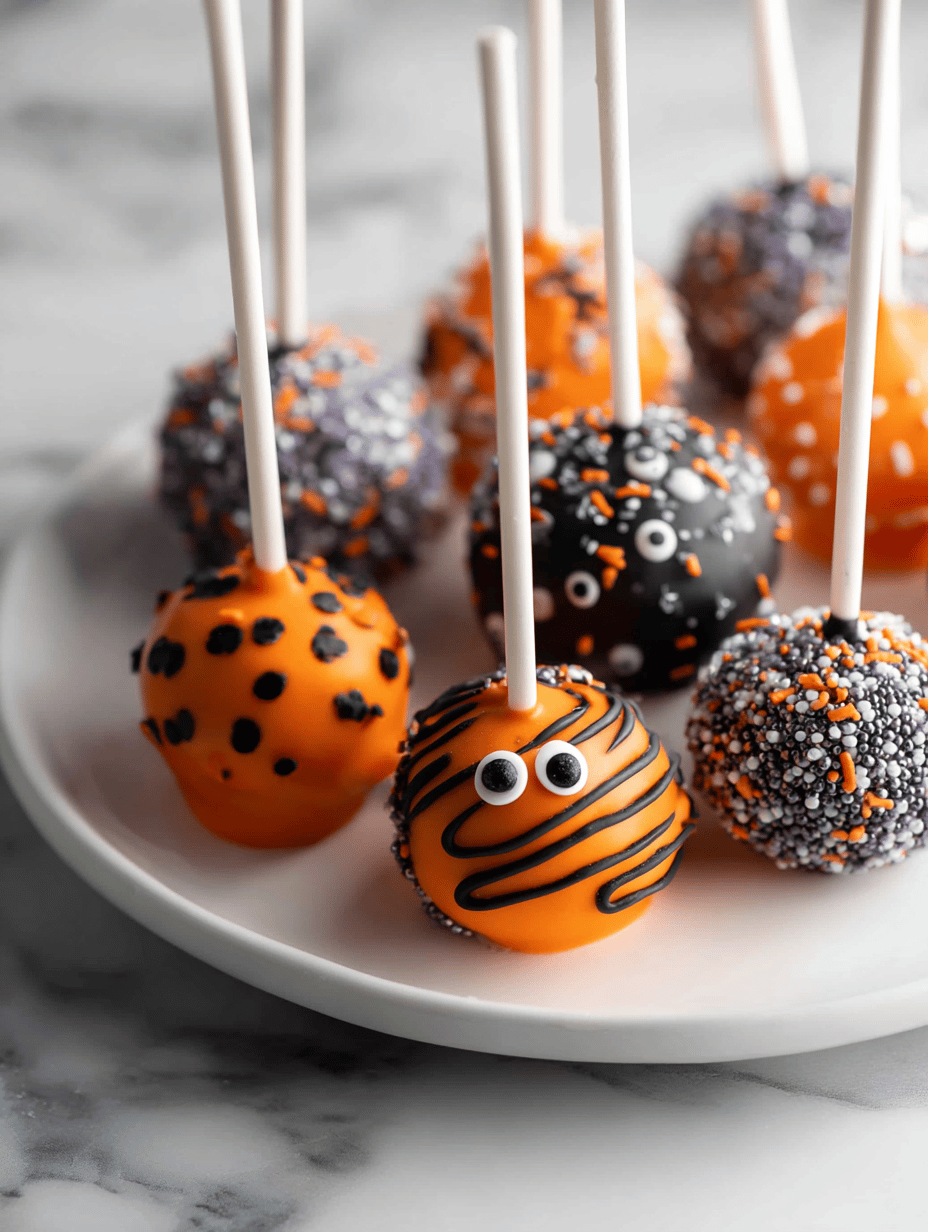
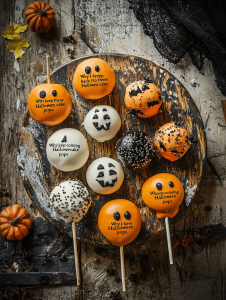
Step 4: Once firm, dip each pop into the remaining melted chocolate, swirling to coat evenly. Add sprinkles or edible glitter while still wet for extra magic.
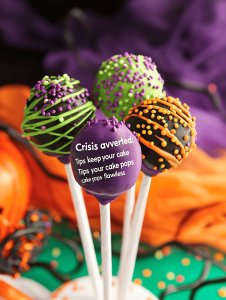
Crisis averted: Tips to keep your cake pops flawless
- Chocolate should be smooth and shiny, not dull or grainy.
- Cake balls must be cold enough to hold shape, but not frozen hard.
- Sticks should be inserted at a slight angle for stability.
- Sprinkles or decorations should be added while the coating is still damp to stick well.
Common Halloween cake pop pitfalls and how to dodge them
- Chocolate seized or cooled too quickly.? CHOCOLATE IS DULL OR GRAINY — Keep chocolate warm but not hot, stir constantly, and use fresh chocolate if needed.
- Not chilling enough before coating.? CAKE BALLS ARE TOO SOFT — Chill until firm, then handle gently to prevent cracking.
- Inserting sticks into warm or soft cake.? STICKS FALL OUT — Insert at a slight angle, and dip into chocolate to secure.
- Decorating too late.? DECORATIONS FALL OFF — Add sprinkles immediately after dipping, while coating is still wet.

Halloween Cake Pops
Ingredients
Equipment
Method
- Start by melting your chocolate in a heatproof bowl over a double boiler or in short bursts in the microwave, stirring until smooth and glossy. The chocolate should be silky and shiny—if it looks dull, keep warming gently.

- Use a spoon or piping bag to dollop a small amount of melted chocolate into each cavity of your cake crumb mixture, then nestle a surprise mini candy or a splash of flavored syrup inside each one. Cover with more cake crumbs to seal the surprises inside.

- Gently roll the mixture into balls, about the size of a golf ball, making sure each is firm and well-shaped. Place a cake pop stick into each ball at a slight angle, pressing gently to secure.
- Place the assembled cake pops on a parchment-lined tray and chill in the refrigerator for about 30 minutes until they’re firm and cold. This helps them hold their shape during coating.
- Once chilled, dip each cake pop into the melted chocolate, swirling gently to coat evenly. Tap off excess chocolate and place the coated pops on a cooling rack.

- Add sprinkles, edible glitter, or tiny candies onto the wet coating immediately after dipping for a festive and spooky look. Let the chocolate set completely at room temperature or in the fridge.
- Once the coating is firm and shiny, carefully remove the cake pops from the rack. Serve immediately or store in an airtight container until ready to enjoy.
Notes

Welcome to Exploreing New Tastes. I’m really glad you found your way here. I’m a food blogger driven by curiosity more than perfection. I think about flavors constantly, how they change across cultures, how a small tweak can completely shift a dish, and how food tells stories long before anyone sits down to eat. This blog is where I document that curiosity, one recipe and one experience at a time.