There’s something about the smell of crispy paneer cutlets frying that instantly transports me back to my childhood kitchen. It’s that perfect mix of golden crust and melty interior that feels like a warm hug from the past, made with simple ingredients but packed with nostalgia. I love how these cutlets can turn an ordinary snack into a moment of comfort, especially when served with a tangy chutney or a squeeze of lemon.
Making paneer cutlets at home isn’t just about the taste; it’s about the act of cooking something familiar, with your own hands, that brings a quiet joy. The process is straightforward, but it’s those little details—the crispness of the exterior, the softness inside—that make every bite special. They’re perfect for a quick snack, a family dinner, or even a shared plate during a lazy weekend afternoon.
Focusing on the nostalgic comfort of homemade paneer cutlets, this recipe emphasizes the sensory joy of crispy exteriors and melty interiors, crafted with simple ingredients that evoke childhood memories and bring a sense of warmth to everyday meals.
Nostalgic Crispy Comfort
- Frying these cutlets fills my kitchen with a warm, cheesy aroma that feels like a hug from childhood.
- There’s a quiet pride in turning simple ingredients into something crispy and golden—like capturing a fleeting moment of joy.
- I love how the texture plays with contrast—the crunchy outside giving way to that soft, melty paneer inside.
- Every time I make these, I remember rushing home after school, eager for a snack that’s as satisfying as it is nostalgic.
- Sharing these with friends always sparks a little smile, reminding me how good comfort food can bring people together.
The story behind this recipe
Growing up, I always associated paneer with Sunday family dinners—those soft cubes melting into spicy gravies. It wasn’t until I started experimenting in my own kitchen that I realized how versatile paneer really is, especially when turned into crispy cutlets. The first batch was a happy accident—crisp on the outside, creamy on the inside—something I knew I had to perfect and share. Now, these cutlets are my go-to snack when I want something familiar yet exciting, a little crunch with every bite that reminds me of home cooking and lazy weekends.
Trivia and historical tidbits
- Paneer, also known as Indian cottage cheese, has been a staple in Indian cuisine for centuries, dating back to ancient times when dairy was central to rural diets.
- The idea of frying paneer in a breadcrumb coating likely evolved as a way to add texture and make it more appealing as a snack or appetizer, blending Indian flavors with Western frying techniques.
- In many Indian households, paneer cutlets are a nostalgic street food, often made with leftover paneer, transformed into crispy, portable bites perfect for tea-time or festive gatherings.
Key ingredients in detail
- Paneer: I prefer fresh, soft paneer that feels slightly crumbly yet melts smoothly. If your paneer is too firm, crumble it well—this helps it blend better with spices.
- Breadcrumbs: I use panko for extra crunch, but regular fine breadcrumbs work fine. Toast them lightly before mixing for a richer flavor and a more golden crust.
- Green chilies: I love a good punch of heat, so I finely chop fresh green chilies—just enough to see tiny bits but not overpower. Adjust to your spice tolerance.
- Ginger and garlic: I grate fresh ginger and garlic for a bright, pungent aroma that wakes up the palate. If you’re short on time, use a good-quality paste, but fresh is best.
- Spices: I keep a mix of cumin powder, coriander, and a dash of garam masala handy. Toast the spices briefly in the pan to release their full aroma before adding to the mixture.
- Binding agent: I prefer a beaten egg to help everything hold together, but if you’re vegan, mashed potato or a splash of water with a tablespoon of flour can do the trick—just expect a slightly different texture.
- Oil: I use a neutral oil like sunflower or canola for frying, but a good ghee can add a lovely richness and extra crispness—just watch the temperature so it doesn’t burn.
Spotlight on key ingredients
Paneer:
- I prefer fresh, soft paneer that feels slightly crumbly yet melts smoothly. If your paneer is too firm, crumble it well—this helps it blend better with spices.
- Breadcrumbs: I use panko for extra crunch, but regular fine breadcrumbs work fine. Toast them lightly before mixing for a richer flavor and a more golden crust.
Spices:
- Green chilies: I love a good punch of heat, so I finely chop fresh green chilies—just enough to see tiny bits but not overpower. Adjust to your spice tolerance.
- I keep a mix of cumin powder, coriander, and a dash of garam masala handy. Toast the spices briefly in the pan to release their full aroma before adding to the mixture.
Notes for ingredient swaps
- Dairy-Free: Swap paneer for firm tofu—less creamy, but still holds shape and absorbs flavors.
- Gluten-Free: Use crushed cornflakes or almond meal instead of breadcrumbs for crunch and texture.
- Spicy Heat: Replace green chilies with a pinch of cayenne or paprika if you prefer milder heat or smoky flavor.
- Flavor Boost: Add a teaspoon of smoked paprika or cumin seeds to deepen the aroma and smoky notes.
- Herb Variations: Incorporate chopped cilantro or mint for fresh, herbal brightness that complements the spices.
- Binding Agent: Instead of egg, try mashed sweet potato or a tablespoon of chickpea flour for vegan binding.
- Oil Choice: Use coconut or sesame oil for frying to add a different aroma and flavor profile, especially for a more aromatic finish.
Equipment & Tools
- Mixing bowl: Combine ingredients thoroughly.
- Fork: Mash and mix ingredients evenly.
- Flat plate: Shape and coat cutlets.
- Frying pan: Cook the cutlets evenly with controlled heat.
- Slotted spoon: Remove fried cutlets without excess oil.
Step-by-step guide to paneer cutlets
- Equipment & Tools: Gather a mixing bowl, a fork, a flat plate, a frying pan (preferably non-stick), and a slotted spoon for frying.
- Crumble the paneer: Break the paneer into small crumbs with your fingers or a fork, aiming for a coarse texture but no large chunks.
- Mix ingredients: In the bowl, combine paneer, breadcrumbs, chopped green chilies, grated ginger and garlic, spices, and beaten egg. Mix well until it holds together when pressed.
- Form cutlets: Take a small handful of the mixture, roll into a ball, then flatten gently into a patty about 1 cm thick. Repeat for all mixture.
- Heat oil: Pour enough neutral oil into the pan to cover the base and heat over medium heat (about 160°C / 320°F). Wait until shimmering but not smoking.
- Fry cutlets: Place cutlets in the hot oil, about 3-4 at a time, without crowding. Cook for 3-4 minutes per side or until golden brown and crispy.
- Check for doneness: The cutlets should be evenly golden, crispy outside, and soft inside. They should crackle when you bite into them and smell aromatic.
- Rest & serve: Remove with a slotted spoon, drain on paper towels, and let rest for 2 minutes. Serve hot with chutney or lemon wedges.
Let the cutlets rest for 2 minutes after frying to settle. Serve immediately with your favorite chutney or lemon slices for added zing.
How to Know It’s Done
- Golden brown color with crispy exterior.
- Aromatic smell of spices and frying oil.
- Crisp edges crackle when bitten.
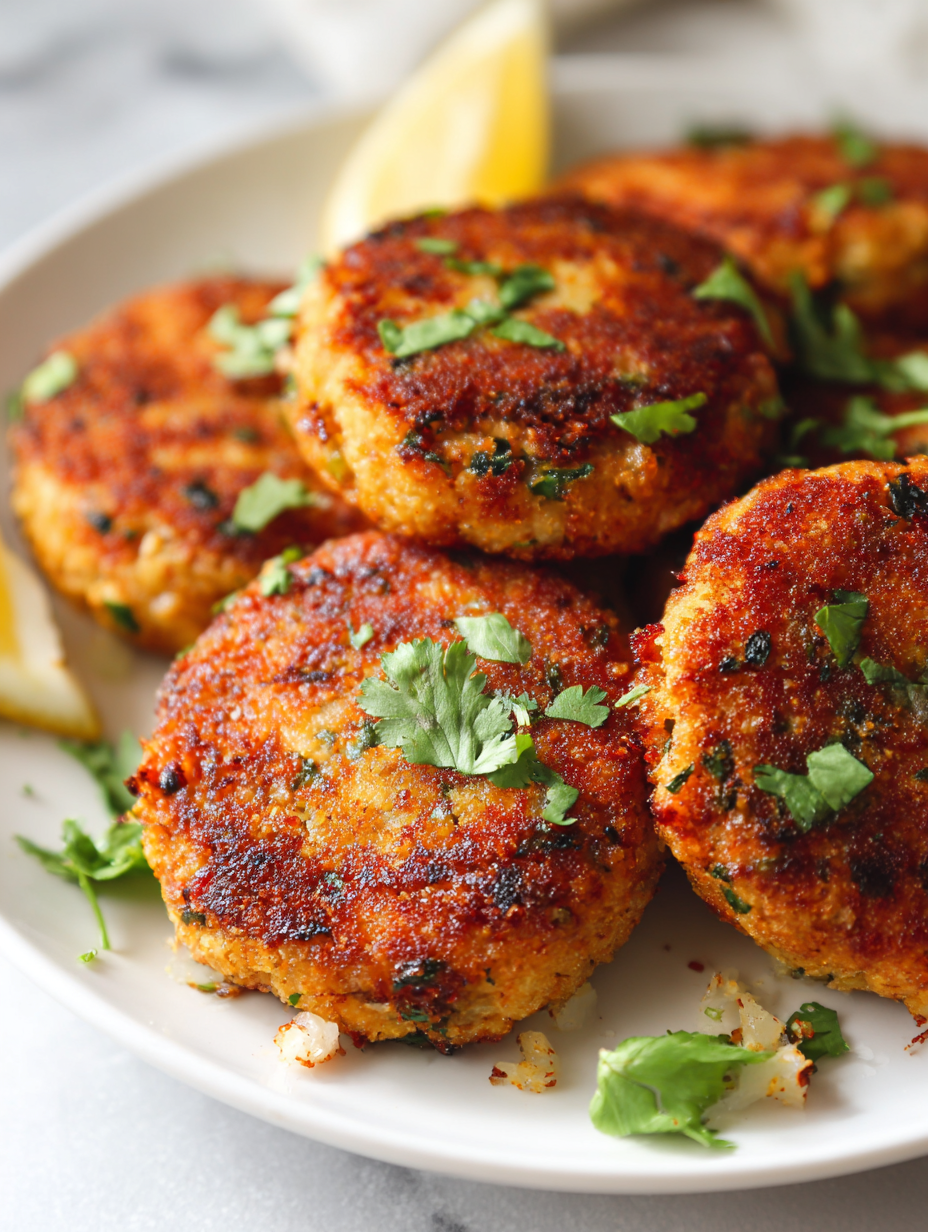
Nostalgic Crispy Paneer Cutlets
Ingredients
Equipment
Method
- Crumb the paneer into a large mixing bowl, breaking it into small, coarse pieces with your fingers or a fork.
- Add the chopped green chili, grated ginger, garlic, cumin, coriander, and garam masala to the paneer. Mix thoroughly to distribute the spices evenly.
- Stir in the beaten egg and half of the breadcrumbs, kneading gently until the mixture is moist but holds together when pressed.
- Divide the mixture into four equal portions and shape each into a patty about 1 cm thick on a flat plate.
- Pour the remaining breadcrumbs into a shallow dish. Gently press each patty into the breadcrumbs, coating all sides evenly for a crispy crust.
- Heat oil in a frying pan over medium heat until shimmering and hot, about 160°C (320°F). You can test readiness by dropping a small breadcrumb—if it sizzles and rises, the oil is ready.
- Carefully place the coated cutlets into the hot oil, working in batches to avoid overcrowding. Fry for about 3-4 minutes per side, or until they turn a beautiful golden brown and crispy.
- Use a slotted spoon to remove the cutlets from the oil, draining excess oil onto paper towels. Let them rest for 2 minutes to set.
- Transfer the crispy paneer cutlets to a serving plate. Serve hot with tangy chutney or a squeeze of lemon for a delightful snack or meal.
Notes
Pro tips for perfect paneer cutlets
- Use panko breadcrumbs for a super crispy crust that holds up well during frying.
- Keep oil at a steady 160°C / 320°F for even cooking and golden color.
- Chill the shaped cutlets for 10 minutes before frying to help them hold shape.
- Test oil readiness by dropping in a small piece of bread—if it sizzles and rises, it’s ready.
- Fry in batches without overcrowding to prevent temperature drops and soggy cutlets.
- Rest fried cutlets on paper towels to absorb excess oil and stay crispy.
- Serve immediately for the best crunch and melty interior.
Common mistakes and how to fix them
- FORGOT to check oil temperature → Use a thermometer to ensure 160°C / 320°F for even frying.
- DUMPED the spice mixture too quickly → Add spices gradually, cook until fragrant before mixing.
- OVER-TORCHED the paneer → Keep heat moderate, stir constantly to prevent burning or browning.
- MISSED resting time → Let cutlets rest 2 minutes to firm up before frying for better shape.
Quick fixes and pantry swaps
- When oil shimmers, splash a tiny breadcrumb—if it crackles, it’s ready to fry.
- If cutlets stick, patch with a few more breadcrumbs or a quick spray of oil.
- Splash cold water on pan if oil smokes—reduce heat immediately.
- When mixture feels too wet, dump in a bit more breadcrumbs to firm it up.
- Shield delicate cutlets from uneven heat by flipping gently and adjusting flame.
Prep, store, and reheat tips
- Prepare the paneer mixture and shape the cutlets a day in advance; store covered in the fridge for up to 24 hours. The flavors meld and the cutlets firm up, making frying easier and quicker.
- Refrigerate cooked cutlets in an airtight container for up to 2 days. Reheat in a hot skillet or oven until crispy, about 5 minutes, until you hear a gentle crackle and they smell warm and toasted.
- Freeze uncooked cutlets on a tray, then transfer to a sealed bag. They keep well for up to 1 month. Fry straight from frozen, adding a minute or two to cooking time, until golden and crispy.
- Reheat fried cutlets in a 180°C / 350°F oven for 8-10 minutes. They should shimmer with a slight oil sheen, crisp on the outside, and stay tender inside. Avoid microwaving, which makes them soggy.
Top questions about paneer cutlets
1. Can I use store-bought paneer for this recipe?
Use fresh paneer that’s soft and crumbly. It melts better and binds easily with spices and breadcrumbs.
2. Can I substitute the paneer with something else?
Yes, you can. Just crumble it well and maybe add a little extra binding like mashed potato if it feels dry.
3. How do I know when the oil is hot enough for frying?
Keep the oil temperature steady at around 160°C (320°F). If it’s too cold, cutlets absorb oil and get soggy.
4. How many cutlets can I fry at once?
Fry in small batches to keep the oil temperature consistent. Overcrowding makes the cutlets greasy and less crispy.
5. Can I make these ahead and freeze them?
Yes, you can freeze uncooked cutlets for up to a month. Fry directly from frozen, adding an extra minute to cooking time.
6. How do I reheat leftover paneer cutlets?
To reheat, bake in a preheated oven at 180°C (350°F) for 8-10 minutes until they shimmer and crackle.
7. What if my mixture is too sticky to shape?
If the mixture feels too wet, add more breadcrumbs to absorb moisture and firm things up before shaping.
8. Can I use different breadcrumbs?
Use panko breadcrumbs for a crunchier exterior. Regular breadcrumbs will still work but may be less crispy.
9. How can I make these less spicy?
Adjust the green chilies to your spice preference. For milder flavor, reduce or omit, or add a dash of smoked paprika for smoky heat.
10. Why do my cutlets fall apart?
Ensure the cutlets rest for at least 2 minutes after frying. This helps them stay crispy and firm up inside.
Making these paneer cutlets brings a little burst of nostalgia and comfort into my kitchen. The crispy exterior and soft, melty interior are honest reminders of simple joys—no fancy ingredients, just good, honest cooking. They’re perfect for when I need a quick snack or want to share something familiar with friends.
In the end, it’s about those small moments—the sizzling sound, the warm aroma—that make cooking worthwhile. These cutlets aren’t just food; they’re a little piece of home I can carry with me, no matter where I am.

Welcome to Exploreing New Tastes. I’m really glad you found your way here. I’m a food blogger driven by curiosity more than perfection. I think about flavors constantly, how they change across cultures, how a small tweak can completely shift a dish, and how food tells stories long before anyone sits down to eat. This blog is where I document that curiosity, one recipe and one experience at a time.