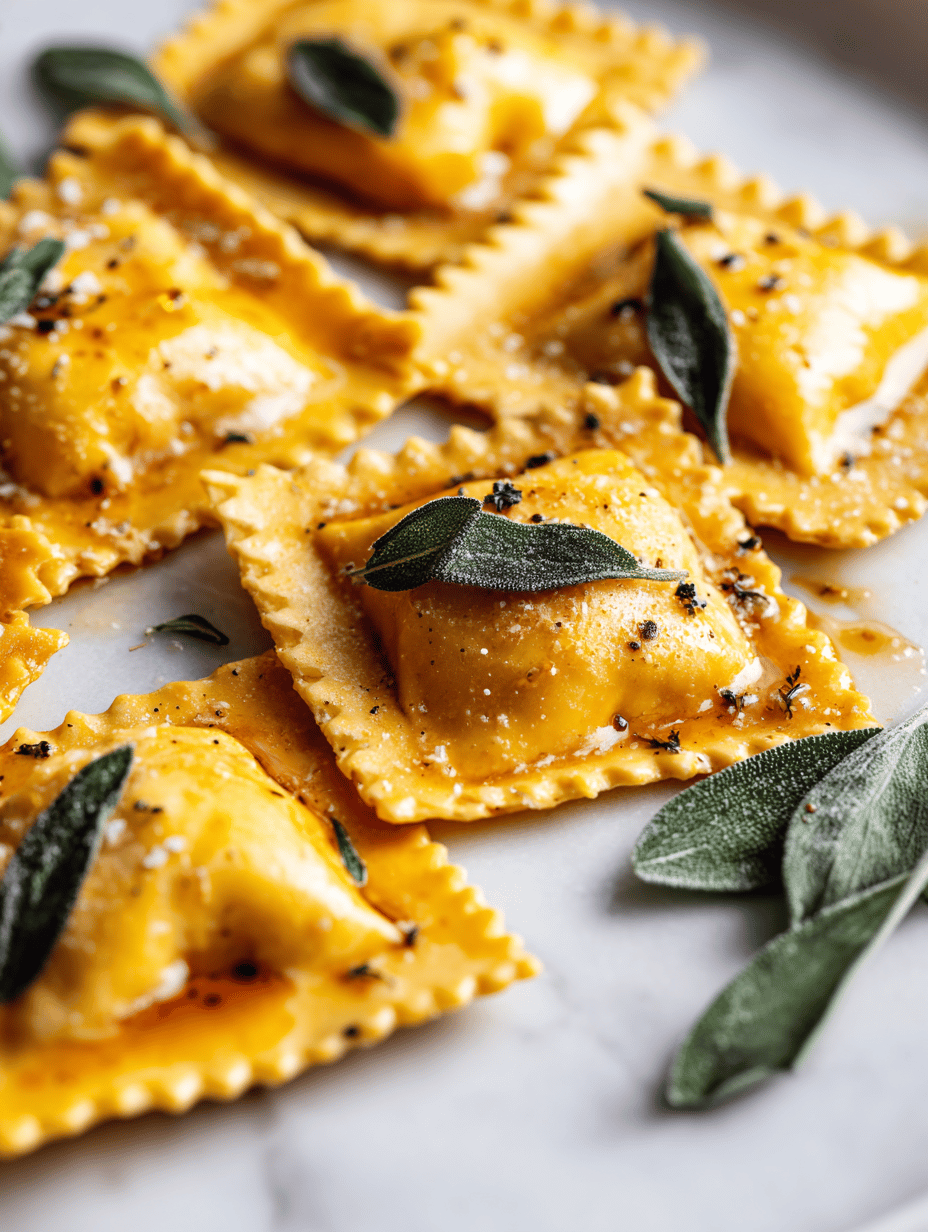
Blog

  • Whispering Ghost Meringues: A Delicate Dance with Air and Shadows

    Whispering Ghost Meringues: A Delicate Dance with Air and Shadows

    Most meringues are about sweetness and light, but ghost meringues are about whisper-thin patience and shadows. They’re the kind of treat that feels almost too delicate to make, yet somehow it’s the simplest thing—air whipped into a cloud, baked until just the right crisp. It’s a quiet dance between heat and patience, where every crackle sings of fleeting beauty.

    Why These Ghosts Haunt My Kitchen

    The quiet beauty of these meringues is addictive. They remind me that sometimes, the simplest ingredients—air and sugar—can create something hauntingly beautiful. Making them feels like summoning a fleeting shadow, a tiny miracle to hold in your hand. I keep coming back because they’re a delicate reminder of the ephemeral and the art of patience.

    Ghostly Ingredients and Their Shadows

    • Egg whites: The fragile core of these spirits. Use fresh, room-temp whites for best volume.
    • Superfine sugar: Fine enough to dissolve easily, giving a smooth, glossy finish. Regular sugar can work, but expect slightly less shine.
    • A splash of lemon juice or vinegar: Helps stabilize the whites, making them more resilient. Skip if you prefer a more neutral flavor.
    • Optional flavorings: Vanilla, lemon zest, or smoked salt add subtle layers. Use sparingly, as these are whisper-thin treats.
    • Parchment paper: A ghostly, non-stick surface that makes peeling off the meringues effortless.

    Tools of the Translucent Art

    • Stand mixer or hand whisk: To whip the egg whites to perfect stiffness.
    • Baking sheet with parchment paper: Provides a stable, non-stick surface for baking.
    • Piping bag with round tip: Shapes the delicate ghostly forms.
    • Oven with precise temperature control: Ensures even, gentle drying of the meringues.

    Steps to Summon Ethereal Meringues

    Step 1: Preheat your oven to 90°C (200°F). Line a baking sheet with parchment paper.

    Step 2: In a clean, dry bowl, whisk 3 large egg whites until soft peaks form, about 2-3 minutes.

    Step 3: Gradually add 150g (¾ cup) of superfine sugar, a tablespoon at a time, while whisking constantly.

    Step 4: Continue beating until the meringue is glossy, firm, and holds stiff peaks, about 5-7 minutes.

    Step 5: Transfer the meringue to a piping bag fitted with a plain round tip. Pipe ghostly, wispy shapes or small dollops.

    Step 6: Bake in the oven for 1.5 hours, until they sound hollow when tapped and are crisp.

    Step 7: Turn off the oven and leave the meringues inside to cool completely, about 2 hours or overnight.

    Step 8: Once cooled, gently peel them off the parchment. They should be light, airy, and slightly smoky on the edges.

    Sly Cues and Subtle Signs of Meringue Mastery

    • The meringue should be glossy and smooth, not grainy or dull.
    • It should hold stiff peaks when lifted with a spoon.
    • Bake until the meringues sound hollow when tapped.
    • Edges may turn a faint, smoky hue—this is normal and adds flavor.

    Ghostly Missteps and How to Vanish Them

    • Egg whites won’t whip up.? Add a splash of lemon juice or vinegar to stabilize whites if they won’t stiffen.
    • Meringue is runny or sticky.? Gently fold in any remaining sugar if mixture is too runny.
    • Edges turn darker or crack.? Reduce oven temperature slightly if edges brown too quickly.
    • Meringues crack when cooling.? Leave meringues in oven until completely cooled to prevent cracking.

    Ghost Meringues

    Ghost meringues are delicate, whisper-thin treats made by whipping egg whites with sugar until glossy and firm, then piping into ethereal shapes and baking until crisp. Their final appearance is light, airy, and slightly smoky around the edges, resembling ghostly wisps frozen in time. These treats highlight the art of patience and the beauty of simple ingredients transformed through gentle heat.
    Prep Time 15 minutes
    Cook Time 1 hour 30 minutes
    Total Time 1 hour 45 minutes
    Servings: 12
    Course: Main Course
    Cuisine: dessert
    Calories: 50

    Ingredients
      

    • 3 large egg whites fresh, room temperature
    • 150 g superfine sugar or regular sugar, finely ground
    • 1 tablespoon lemon juice or vinegar stabilizes the whites
    • optional vanilla extract or flavorings whisper-thin flavor layer

    Equipment

    • Stand mixer or hand whisk
    • Baking sheet with parchment paper
    • Piping bag with round tip

    Method
     

    1. Preheat your oven to 90°C (200°F). Line a baking sheet with parchment paper, creating a clean, ghostly surface.
    2. In a clean, dry bowl, whisk the egg whites with a splash of lemon juice or vinegar until soft peaks form, about 2-3 minutes. You’ll see the whites turn glossy and start to hold their shape.
    3. Gradually add superfine sugar, a tablespoon at a time, while continuously whisking. The mixture will become thick, glossy, and smooth, holding stiff peaks when you lift the whisk.
    4. Continue beating until the meringue is shiny and holds stiff peaks, about 5-7 minutes. You’ll notice it becomes more voluminous and firm.
    5. Transfer the meringue into a piping bag fitted with a round tip. Pipe ghostly, wispy shapes or small dollops onto the prepared parchment, creating delicate, airy forms.
    6. Bake the meringues in the oven for 1.5 hours. They will turn crisp and sound hollow when tapped. The edges may develop a faint smoky hue, adding to their ghostly appearance.
    7. Turn off the oven and leave the meringues inside to cool completely for about 2 hours or overnight. This gentle cooling prevents cracking and ensures they stay light and airy.
    8. Once cooled, gently peel the meringues off the parchment. They should be delicate, slightly smoky at the edges, and perfect for hauntingly beautiful treats.

    Notes

    Ensure all equipment is completely clean and dry to achieve maximum volume. For extra flavor, consider adding a hint of vanilla or lemon zest sparingly. Store in an airtight container to keep them crisp and ghostly until ready to serve.
    These ghost meringues aren’t just a treat; they’re a quiet nod to the fleeting, intangible moments we chase. Their crisp shells crackle softly, revealing a whisper of sweetness that melts on the tongue. Perfect for a quiet afternoon, they invite you to slow down and savor the delicate art of air and shadow. Feel free to experiment with flavors—lemon zest, vanilla, or a hint of smoked salt—to make each batch uniquely yours.

  • Whispering Ghost Meringues: A Delicate Dance with Air and Shadows

    Whispering Ghost Meringues: A Delicate Dance with Air and Shadows

    Most meringues are about sweetness and light, but ghost meringues are about whisper-thin patience and shadows. They’re the kind of treat that feels almost too delicate to make, yet somehow it’s the simplest thing—air whipped into a cloud, baked until just the right crisp. It’s a quiet dance between heat and patience, where every crackle sings of fleeting beauty.

    Why These Ghosts Haunt My Kitchen

    The quiet beauty of these meringues is addictive. They remind me that sometimes, the simplest ingredients—air and sugar—can create something hauntingly beautiful. Making them feels like summoning a fleeting shadow, a tiny miracle to hold in your hand. I keep coming back because they’re a delicate reminder of the ephemeral and the art of patience.

    Ghostly Ingredients and Their Shadows

    • Egg whites: The fragile core of these spirits. Use fresh, room-temp whites for best volume.
    • Superfine sugar: Fine enough to dissolve easily, giving a smooth, glossy finish. Regular sugar can work, but expect slightly less shine.
    • A splash of lemon juice or vinegar: Helps stabilize the whites, making them more resilient. Skip if you prefer a more neutral flavor.
    • Optional flavorings: Vanilla, lemon zest, or smoked salt add subtle layers. Use sparingly, as these are whisper-thin treats.
    • Parchment paper: A ghostly, non-stick surface that makes peeling off the meringues effortless.

    Tools of the Translucent Art

    • Stand mixer or hand whisk: To whip the egg whites to perfect stiffness.
    • Baking sheet with parchment paper: Provides a stable, non-stick surface for baking.
    • Piping bag with round tip: Shapes the delicate ghostly forms.
    • Oven with precise temperature control: Ensures even, gentle drying of the meringues.

    Steps to Summon Ethereal Meringues

    Step 1: Preheat your oven to 90°C (200°F). Line a baking sheet with parchment paper.

    Step 2: In a clean, dry bowl, whisk 3 large egg whites until soft peaks form, about 2-3 minutes.

    Step 3: Gradually add 150g (¾ cup) of superfine sugar, a tablespoon at a time, while whisking constantly.

    Step 4: Continue beating until the meringue is glossy, firm, and holds stiff peaks, about 5-7 minutes.

    Step 5: Transfer the meringue to a piping bag fitted with a plain round tip. Pipe ghostly, wispy shapes or small dollops.

    Step 6: Bake in the oven for 1.5 hours, until they sound hollow when tapped and are crisp.

    Step 7: Turn off the oven and leave the meringues inside to cool completely, about 2 hours or overnight.

    Step 8: Once cooled, gently peel them off the parchment. They should be light, airy, and slightly smoky on the edges.

    Sly Cues and Subtle Signs of Meringue Mastery

    • The meringue should be glossy and smooth, not grainy or dull.
    • It should hold stiff peaks when lifted with a spoon.
    • Bake until the meringues sound hollow when tapped.
    • Edges may turn a faint, smoky hue—this is normal and adds flavor.

    Ghostly Missteps and How to Vanish Them

    • Egg whites won’t whip up.? Add a splash of lemon juice or vinegar to stabilize whites if they won’t stiffen.
    • Meringue is runny or sticky.? Gently fold in any remaining sugar if mixture is too runny.
    • Edges turn darker or crack.? Reduce oven temperature slightly if edges brown too quickly.
    • Meringues crack when cooling.? Leave meringues in oven until completely cooled to prevent cracking.

    Ghost Meringues

    Ghost meringues are delicate, airy confections made from whipped egg whites and superfine sugar, baked until crisp and lightly smoky at the edges. Their whisper-thin structure and ghostly shapes create a hauntingly beautiful treat that feels almost too fragile to hold. The process involves whipping, piping, and slow baking to achieve their ephemeral, cloud-like appearance.
    Prep Time 15 minutes
    Cook Time 1 hour 30 minutes
    Total Time 1 hour 45 minutes
    Servings: 12
    Course: Main Course
    Cuisine: French
    Calories: 50

    Ingredients
      

    • 3 large egg whites preferably room temperature
    • 150 g superfine sugar or regular sugar, finely processed
    • 1 tablespoon lemon juice or vinegar stabilizes the whites
    • optional flavorings vanilla, lemon zest, smoked salt, as desired

    Equipment

    • Stand mixer or hand whisk
    • Baking sheet with parchment paper
    • Piping bag with round tip
    • Oven with temperature control

    Method
     

    1. Preheat your oven to 90°C (200°F). Line a baking sheet with parchment paper, creating a ghostly, non-stick surface for the meringues.
    2. In a clean, dry bowl, whip the egg whites using a stand mixer or hand whisk until soft peaks form, about 2-3 minutes. You should see gentle ripples and a slight sheen.
    3. Add the lemon juice or vinegar to the whipped whites to stabilize them. Continue whisking until the mixture is frothy and glossy.
    4. Gradually add the superfine sugar a tablespoon at a time, whisking constantly. The mixture will become thick, glossy, and hold stiff peaks after about 5-7 minutes.
    5. Transfer the fluffy meringue into a piping bag fitted with a round tip. Pipe whimsical ghostly shapes or small dollops onto the prepared parchment, aiming for wispy, delicate forms.
    6. Bake in the preheated oven for 1.5 hours. The meringues should sound hollow when tapped and feel crisp and light. The edges may turn a faint smoky hue, adding to their ghostly charm.
    7. Turn off the oven and leave the meringues inside to cool completely, about 2 hours or overnight. This slow cooling prevents cracking and ensures they remain airy and delicate.
    8. Once cooled, gently peel the fragile meringues off the parchment paper. They should be light, airy, and slightly smoky on the edges, perfect for serving.
    9. Enjoy these whisper-thin, ghostly treats as a delicate finishing touch to your dessert spread or a hauntingly beautiful snack on their own.

    Notes

    For extra ghostly effect, pipe tiny wisps or faces onto the meringues before baking. Handle gently—they are fragile! Store in an airtight container for up to 2 days to maintain crispness.
    These ghost meringues aren’t just a treat; they’re a quiet nod to the fleeting, intangible moments we chase. Their crisp shells crackle softly, revealing a whisper of sweetness that melts on the tongue. Perfect for a quiet afternoon, they invite you to slow down and savor the delicate art of air and shadow. Feel free to experiment with flavors—lemon zest, vanilla, or a hint of smoked salt—to make each batch uniquely yours.

  • Spooky Stuffed Peppers: A Haunted Twist on Comfort Food

    Spooky Stuffed Peppers: A Haunted Twist on Comfort Food

    I love the idea of turning everyday ingredients into something unexpectedly festive. These spooky stuffed peppers are a nod to Halloween but in a way that’s totally edible and satisfying. I’ve played with the filling a lot—sometimes adding spicy chorizo, other times keeping it veggie-friendly—and they always surprise me.

    Why I keep returning to this recipe

    It’s flexible, forgiving, and always feels slightly festive. The way the cheese melts into the filling, creating gooey pockets, makes each bite a little celebration. Plus, it’s easy enough to whip up during busy nights but special enough to serve to guests. Every time I make this, I find a new way to tweak the fillings or toppings, keeping it fresh and exciting.

    Breaking down the ingredients of spooky stuffed peppers

    • Bell peppers: Colorful and sturdy, they hold all the filling and add a sweet crunch.
    • Ground meat or lentils: Adds heartiness; swap with cooked quinoa for a vegetarian version.
    • Cooked rice or grains: Gives structure; brown rice adds nuttiness, jasmine offers aroma.
    • Onions and garlic: Build flavor; sauté until fragrant, about 5 minutes.
    • Cheese (cheddar, mozzarella): Melty and gooey topping; choose sharp or mild based on taste.
    • Herbs (parsley, cilantro): Fresh brightness; add at the end for a herbal punch.
    • Paprika and spices: Smoky, warm notes that bring the dish to life.

    Tools of the trade for spooky stuffed peppers

    • Chef’s knife: For cutting tops and scooping out seeds.
    • Sauté pan: To cook the filling ingredients.
    • Baking dish: Holds the peppers while they bake.
    • Spoon or piping bag: To stuff the peppers neatly.
    • Oven thermometer (optional): To ensure oven temperature accuracy.

    Step-by-step guide to creating your spooky stuffed peppers

    Step 1: Preheat your oven to 190°C (375°F).

    Step 2: Cut the tops off the peppers and scoop out seeds carefully.

    Step 3: In a pan, sauté diced onions and garlic until translucent, about 5 minutes.

    Step 4: Mix cooked rice, ground meat, and chopped herbs into the sautéed veggies.

    Step 5: Stuff the peppers with the filling, pressing down gently.

    Step 6: Place the peppers upright in a baking dish. Top with shredded cheese and a sprinkle of paprika.

    Step 7: Bake for 35-40 minutes until peppers are tender and cheese is bubbly and golden.

    Step 8: Let rest for 5 minutes before serving. Garnish with fresh herbs if desired.

    Cooking checkpoints to ensure perfection

    • Peppers should be tender when pierced with a fork—test after 35 minutes.
    • Cheese should be melted and slightly browned—adjust baking time if needed.
    • Filling should be hot all the way through—use a thermometer to check 75°C (165°F).
    • The edges of the peppers might char slightly—pull them out early if they start to blacken excessively.

    Common mistakes and how to fix them

    • Squished peppers when slicing.? Use a sharp knife to cut peppers to avoid squashing.
    • Cheese and tops burning before peppers are tender.? Adjust oven rack if peppers brown too quickly.
    • Soggy, watery stuffing.? Make sure filling is not too wet.
    • Under or overcooked peppers.? Bake at the right temperature.

    Spooky Stuffed Peppers

    These festive stuffed peppers feature colorful bell peppers filled with a savory mixture of ground meat, rice, onions, and herbs, topped with melted cheese for a gooey, satisfying bite. The peppers are baked until tender and bubbly, creating a visually appealing and delicious dish perfect for Halloween or any celebration. The filling is adaptable, allowing for vegetarian or spicy variations to suit different tastes.
    Prep Time 15 minutes
    Cook Time 40 minutes
    Total Time 55 minutes
    Servings: 4
    Course: Main Course
    Cuisine: American
    Calories: 320

    Ingredients
      

    • 4 large bell peppers assorted colors, tops cut off and seeds removed
    • 1/2 lb ground meat beef, turkey, or chicken
    • 1 cup cooked rice white or brown rice
    • 1 small onion diced
    • 2 cloves garlic minced
    • 1 cup shredded cheese cheddar or mozzarella
    • 2 tablespoons fresh herbs parsley or cilantro, chopped
    • 1 teaspoon paprika for topping and flavor
    • 1 teaspoon spices smoked paprika, optional

    Equipment

    • Chef’s knife
    • Sauté pan
    • Baking dish
    • Spoon or piping bag
    • Oven thermometer (optional)

    Method
     

    1. Preheat your oven to 190°C (375°F). Place the bell peppers on a baking sheet and carefully cut off the tops, removing seeds and membranes with a small knife or spoon.
    2. Heat a sauté pan over medium heat and add a splash of oil. Sauté diced onions and minced garlic until fragrant and translucent, about 5 minutes. The kitchen will fill with a warm, savory aroma.
    3. Add the ground meat to the pan and cook until browned, breaking it apart with a spatula. Continue cooking until no pink remains, about 7-8 minutes. Season with a pinch of salt and spices, stirring well.
    4. Stir in the cooked rice and chopped herbs into the meat mixture. Mix thoroughly and cook for another 2 minutes to combine all flavors.
    5. Stuff each hollowed-out pepper with the filling, pressing gently to pack it in. Use a spoon or piping bag for neatness, filling the peppers to the top.
    6. Place the stuffed peppers upright in a baking dish. Top each with shredded cheese and sprinkle with paprika for color and flavor.
    7. Bake in the preheated oven for 35-40 minutes, until the peppers are tender when pierced and the cheese is bubbly and golden brown. You’ll hear gentle bubbling and see the cheese’s edges crisping.
    8. Remove from the oven and let rest for 5 minutes. The peppers will hold their shape and the filling will be hot and flavorful.
    9. Garnish with additional chopped herbs if desired, and serve warm. Enjoy the gooey, savory stuffing inside tender, colorful peppers for a festive presentation.

    Notes

    Feel free to customize the filling with spicy chorizo or make it vegetarian with lentils or extra vegetables. For a crunchier topping, add some crushed tortilla chips before baking.
    Once out of the oven, these peppers should be tender but still hold their shape. The cheese on top will be gooey, with a smoky hint from paprika. Feel free to add a dash of hot sauce or a squeeze of lemon for brightness. These are perfect for a cozy night, where the flavors warm your soul and the presentation adds a little spooky flair.

  • Spooky Stuffed Peppers: A Haunted Twist on Comfort Food

    Spooky Stuffed Peppers: A Haunted Twist on Comfort Food

    I love the idea of turning everyday ingredients into something unexpectedly festive. These spooky stuffed peppers are a nod to Halloween but in a way that’s totally edible and satisfying. I’ve played with the filling a lot—sometimes adding spicy chorizo, other times keeping it veggie-friendly—and they always surprise me.

    Why I keep returning to this recipe

    It’s flexible, forgiving, and always feels slightly festive. The way the cheese melts into the filling, creating gooey pockets, makes each bite a little celebration. Plus, it’s easy enough to whip up during busy nights but special enough to serve to guests. Every time I make this, I find a new way to tweak the fillings or toppings, keeping it fresh and exciting.

    Breaking down the ingredients of spooky stuffed peppers

    • Bell peppers: Colorful and sturdy, they hold all the filling and add a sweet crunch.
    • Ground meat or lentils: Adds heartiness; swap with cooked quinoa for a vegetarian version.
    • Cooked rice or grains: Gives structure; brown rice adds nuttiness, jasmine offers aroma.
    • Onions and garlic: Build flavor; sauté until fragrant, about 5 minutes.
    • Cheese (cheddar, mozzarella): Melty and gooey topping; choose sharp or mild based on taste.
    • Herbs (parsley, cilantro): Fresh brightness; add at the end for a herbal punch.
    • Paprika and spices: Smoky, warm notes that bring the dish to life.

    Tools of the trade for spooky stuffed peppers

    • Chef’s knife: For cutting tops and scooping out seeds.
    • Sauté pan: To cook the filling ingredients.
    • Baking dish: Holds the peppers while they bake.
    • Spoon or piping bag: To stuff the peppers neatly.
    • Oven thermometer (optional): To ensure oven temperature accuracy.

    Step-by-step guide to creating your spooky stuffed peppers

    Step 1: Preheat your oven to 190°C (375°F).

    Step 2: Cut the tops off the peppers and scoop out seeds carefully.

    Step 3: In a pan, sauté diced onions and garlic until translucent, about 5 minutes.

    Step 4: Mix cooked rice, ground meat, and chopped herbs into the sautéed veggies.

    Step 5: Stuff the peppers with the filling, pressing down gently.

    Step 6: Place the peppers upright in a baking dish. Top with shredded cheese and a sprinkle of paprika.

    Step 7: Bake for 35-40 minutes until peppers are tender and cheese is bubbly and golden.

    Step 8: Let rest for 5 minutes before serving. Garnish with fresh herbs if desired.

    Cooking checkpoints to ensure perfection

    • Peppers should be tender when pierced with a fork—test after 35 minutes.
    • Cheese should be melted and slightly browned—adjust baking time if needed.
    • Filling should be hot all the way through—use a thermometer to check 75°C (165°F).
    • The edges of the peppers might char slightly—pull them out early if they start to blacken excessively.

    Common mistakes and how to fix them

    • Squished peppers when slicing.? Use a sharp knife to cut peppers to avoid squashing.
    • Cheese and tops burning before peppers are tender.? Adjust oven rack if peppers brown too quickly.
    • Soggy, watery stuffing.? Make sure filling is not too wet.
    • Under or overcooked peppers.? Bake at the right temperature.

    Spooky Stuffed Peppers

    These festive stuffed peppers feature colorful bell peppers filled with a savory mixture of ground meat or lentils, rice, onions, and garlic, topped with gooey melted cheese and a sprinkle of paprika. Baked until tender and bubbly, they combine satisfying textures with a fun Halloween twist, perfect for a casual or special occasion meal.
    Prep Time 15 minutes
    Cook Time 40 minutes
    Total Time 55 minutes
    Servings: 4
    Course: Main Course
    Cuisine: International
    Calories: 350

    Ingredients
      

    • 4 large bell peppers assorted colors, tops cut off and seeds removed
    • 1 lb ground meat or lentils optional: swap with cooked quinoa for vegetarian
    • 1 cup cooked rice brown rice adds nuttiness, jasmine adds aroma
    • 1 small onion diced
    • 2 cloves garlic minced
    • 1 cup shredded cheese cheddar or mozzarella, divided
    • 2 tablespoons herbs chopped parsley or cilantro
    • 1 teaspoon paprika for topping and flavor
    • 1 teaspoon spices smoked paprika or chili powder

    Equipment

    • Chef’s knife
    • Sauté pan
    • Baking dish
    • Spoon or piping bag
    • Oven thermometer (optional)

    Method
     

    1. Preheat your oven to 190°C (375°F) and prepare a baking dish.
    2. Using a sharp chef’s knife, cut the tops off the bell peppers and carefully scoop out all seeds and membranes, creating a hollow cavity for the filling.
    3. In a sauté pan, heat a splash of oil over medium heat and sauté diced onions and minced garlic until fragrant and translucent, about 5 minutes. You’ll notice a lovely aroma and the onions turning slightly golden.
    4. Add the ground meat or lentils to the pan, breaking it apart with a spoon, and cook until browned or heated through, about 7-8 minutes. Stir in chopped herbs and spices, then remove from heat.
    5. Mix the cooked rice into the filling mixture until evenly combined. This creates a hearty and flavorful stuffing with a nice balance of textures.
    6. Using a spoon or piping bag, stuff each hollowed pepper with the filling, pressing down gently to pack it in without overflowing.
    7. Place the stuffed peppers upright in the baking dish, then sprinkle shredded cheese evenly over each top and dust with paprika for a festive touch.
    8. Bake in the preheated oven for 35-40 minutes until the peppers are tender when pierced with a fork, and the cheese is bubbling and golden brown on top. The aroma of melted cheese and roasted peppers will fill your kitchen.
    9. Once baking is complete, remove the dish from the oven and let the peppers rest for about 5 minutes. The cheese will set slightly, making them easier to serve.
    10. Garnish with additional chopped herbs if desired, then serve hot, enjoying the gooey cheese and flavorful filling with a slight char on the edges of the peppers.

    Notes

    Feel free to customize the filling with spicy chorizo or keep it veggie-friendly with additional vegetables. Adjust baking time if peppers are larger or smaller. A squeeze of lime or a dollop of sour cream makes a delightful finishing touch.
    Once out of the oven, these peppers should be tender but still hold their shape. The cheese on top will be gooey, with a smoky hint from paprika. Feel free to add a dash of hot sauce or a squeeze of lemon for brightness. These are perfect for a cozy night, where the flavors warm your soul and the presentation adds a little spooky flair.

  • Spooky Stuffed Peppers: A Haunted Twist on Comfort Food

    Spooky Stuffed Peppers: A Haunted Twist on Comfort Food

    I love the idea of turning everyday ingredients into something unexpectedly festive. These spooky stuffed peppers are a nod to Halloween but in a way that’s totally edible and satisfying. I’ve played with the filling a lot—sometimes adding spicy chorizo, other times keeping it veggie-friendly—and they always surprise me.

    Why I keep returning to this recipe

    It’s flexible, forgiving, and always feels slightly festive. The way the cheese melts into the filling, creating gooey pockets, makes each bite a little celebration. Plus, it’s easy enough to whip up during busy nights but special enough to serve to guests. Every time I make this, I find a new way to tweak the fillings or toppings, keeping it fresh and exciting.

    Breaking down the ingredients of spooky stuffed peppers

    • Bell peppers: Colorful and sturdy, they hold all the filling and add a sweet crunch.
    • Ground meat or lentils: Adds heartiness; swap with cooked quinoa for a vegetarian version.
    • Cooked rice or grains: Gives structure; brown rice adds nuttiness, jasmine offers aroma.
    • Onions and garlic: Build flavor; sauté until fragrant, about 5 minutes.
    • Cheese (cheddar, mozzarella): Melty and gooey topping; choose sharp or mild based on taste.
    • Herbs (parsley, cilantro): Fresh brightness; add at the end for a herbal punch.
    • Paprika and spices: Smoky, warm notes that bring the dish to life.

    Tools of the trade for spooky stuffed peppers

    • Chef’s knife: For cutting tops and scooping out seeds.
    • Sauté pan: To cook the filling ingredients.
    • Baking dish: Holds the peppers while they bake.
    • Spoon or piping bag: To stuff the peppers neatly.
    • Oven thermometer (optional): To ensure oven temperature accuracy.

    Step-by-step guide to creating your spooky stuffed peppers

    Step 1: Preheat your oven to 190°C (375°F).

    Step 2: Cut the tops off the peppers and scoop out seeds carefully.

    Step 3: In a pan, sauté diced onions and garlic until translucent, about 5 minutes.

    Step 4: Mix cooked rice, ground meat, and chopped herbs into the sautéed veggies.

    Step 5: Stuff the peppers with the filling, pressing down gently.

    Step 6: Place the peppers upright in a baking dish. Top with shredded cheese and a sprinkle of paprika.

    Step 7: Bake for 35-40 minutes until peppers are tender and cheese is bubbly and golden.

    Step 8: Let rest for 5 minutes before serving. Garnish with fresh herbs if desired.

    Cooking checkpoints to ensure perfection

    • Peppers should be tender when pierced with a fork—test after 35 minutes.
    • Cheese should be melted and slightly browned—adjust baking time if needed.
    • Filling should be hot all the way through—use a thermometer to check 75°C (165°F).
    • The edges of the peppers might char slightly—pull them out early if they start to blacken excessively.

    Common mistakes and how to fix them

    • Squished peppers when slicing.? Use a sharp knife to cut peppers to avoid squashing.
    • Cheese and tops burning before peppers are tender.? Adjust oven rack if peppers brown too quickly.
    • Soggy, watery stuffing.? Make sure filling is not too wet.
    • Under or overcooked peppers.? Bake at the right temperature.

    Spooky Stuffed Peppers

    These festive stuffed peppers are filled with a savory mixture of ground meat, rice, onions, and herbs, topped with melted cheese for gooey goodness. Baked until tender and bubbly, they showcase vibrant colors and a satisfying texture, perfect for a Halloween-inspired dinner or a fun, hearty meal. The peppers hold their shape and offer a slight crunch against the soft, flavorful filling.
    Prep Time 15 minutes
    Cook Time 40 minutes
    Total Time 55 minutes
    Servings: 4
    Course: Main Course
    Cuisine: American
    Calories: 350

    Ingredients
      

    • 4 large bell peppers assorted colors, tops cut off and seeds removed
    • 1/2 pound ground meat beef or turkey, or use cooked lentils for vegetarian
    • 1 cup cooked rice brown rice for nuttiness or jasmine for aroma
    • 1 small onion diced
    • 2 cloves garlic minced
    • 1 cup shredded cheese cheddar or mozzarella
    • 2 tablespoons fresh herbs parsley and cilantro, chopped
    • 1 teaspoon paprika for sprinkling on top

    Equipment

    • Chef’s knife
    • Sauté pan
    • Baking dish
    • Spoon or piping bag
    • Oven thermometer (optional)

    Method
     

    1. Preheat your oven to 190°C (375°F). Prepare the peppers by cutting off the tops and carefully scooping out the seeds, creating a hollow cavity for the filling.
    2. Heat a splash of oil in a sauté pan over medium heat. Add diced onion and minced garlic, cooking until fragrant and translucent, about 5 minutes. The kitchen will fill with a warm aroma and the onions will turn a soft, glossy look.
    3. In a mixing bowl, combine the cooked rice, ground meat, and chopped herbs. Mix until well blended, creating a hearty, colorful filling that holds together but is still moist and flavorful.
    4. Stuff each pepper with the rice mixture, pressing gently to pack the filling in without overflowing. Use a spoon or piping bag for neatness.
    5. Arrange the stuffed peppers upright in a baking dish. Sprinkle shredded cheese generously over the top of each pepper, then lightly dust with paprika for a touch of color and smoky flavor.
    6. Bake in the preheated oven for 35 to 40 minutes, until the peppers are tender when pierced with a fork and the cheese is bubbling and golden brown. You’ll hear a gentle sizzling as the cheese melts and edges start to crisp.
    7. Remove from oven and let rest for about 5 minutes. The peppers will be hot and slightly charred at the edges, with a fragrant aroma inviting you to dig in.
    8. Garnish with additional chopped herbs if desired, then serve hot, allowing the gooey cheese and flavorful filling to delight every bite.
    Once out of the oven, these peppers should be tender but still hold their shape. The cheese on top will be gooey, with a smoky hint from paprika. Feel free to add a dash of hot sauce or a squeeze of lemon for brightness. These are perfect for a cozy night, where the flavors warm your soul and the presentation adds a little spooky flair.

  • Unconventional Halloween Cake Pops: A Spooky Twist with a Surprise Center

    Unconventional Halloween Cake Pops: A Spooky Twist with a Surprise Center

    This Halloween, I’m ditching the usual ghostly cookies and opting for something handheld, fun, and just a little bit spooky. Cake pops are perfect for that—they’re versatile, playful, and easy to customize with colors and surprises inside. Plus, they make a mess that’s totally worth it.

    Why I keep coming back to these Halloween cake pops

    They’re endlessly customizable, and each batch feels like a little ritual. I love the chaos of melting chocolate, the anticipation of dipping, and the surprise of what’s inside each one. Plus, they’re a hit at parties, sparking smiles and conversation. This recipe is my fallback when I need a sweet project that’s both fun and slightly unpredictable.

    Inside the spooky ingredients stash

    • Cake crumbs — I use day-old sponge, but crushed cookies work too. It’s the base that holds everything together.: Crumbs form the core and need to be moist enough to roll into balls but not sticky.
    • Chocolate — Dark, milk, or white, melted smooth. It’s the magic shell and glue.: Silky, melts easily, and sets firm with a shiny finish.
    • Surprise fillings — Mini candies, flavored syrups, or even a dollop of jam. Keep it fun and unexpected.: Adds a hidden burst of flavor or texture inside.
    • Decorations — Sprinkles, edible glitter, tiny candies. Make it festive and spooky.: Visual appeal and extra crunch or shimmer.
    • Cake pop sticks — Wooden or paper, sturdy enough to hold the weight.: Transforms treats into handheld moments of joy.

    Tools of the trade for spooky perfection

    • Double boiler or microwave: Gently melts chocolate without scorching.
    • Spoons or piping bag: Doles out chocolate precisely and neatly.
    • Cake pop sticks: Turns each treat into a handheld bundle of fun.
    • Parchment paper: Prevents sticking and keeps pops neat.
    • Cooling rack: Allows excess chocolate to drip off and cool evenly.

    Step-by-Step for Perfectly Spooky Cake Pops

    Step 1: Start by melting your chocolate in a heatproof bowl over a double boiler or in short bursts in the microwave, stirring between each. Aim for smooth, glossy consistency—if it’s dull or grainy, keep warming gently.

    Step 2: Use a small spoon or piping bag to dollop a bit of chocolate into each cake pop cavity, then add a hidden surprise like a mini candy or a splash of flavored syrup before sealing with more chocolate.

    Step 3: Insert a stick quickly, twisting slightly to secure, and gently tap off excess chocolate. Place on parchment to set in the fridge for about 30 minutes.

    Step 4: Once firm, dip each pop into the remaining melted chocolate, swirling to coat evenly. Add sprinkles or edible glitter while still wet for extra magic.

    Crisis averted: Tips to keep your cake pops flawless

    • Chocolate should be smooth and shiny, not dull or grainy.
    • Cake balls must be cold enough to hold shape, but not frozen hard.
    • Sticks should be inserted at a slight angle for stability.
    • Sprinkles or decorations should be added while the coating is still damp to stick well.

    Common Halloween cake pop pitfalls and how to dodge them

    • Chocolate seized or cooled too quickly.? CHOCOLATE IS DULL OR GRAINY — Keep chocolate warm but not hot, stir constantly, and use fresh chocolate if needed.
    • Not chilling enough before coating.? CAKE BALLS ARE TOO SOFT — Chill until firm, then handle gently to prevent cracking.
    • Inserting sticks into warm or soft cake.? STICKS FALL OUT — Insert at a slight angle, and dip into chocolate to secure.
    • Decorating too late.? DECORATIONS FALL OFF — Add sprinkles immediately after dipping, while coating is still wet.

    Halloween Cake Pops

    These Halloween cake pops are handheld treats made by combining cake crumbs with frosting to form a dough, then shaping them into balls. They are dipped in melted chocolate, decorated with sprinkles or glitter, and inserted onto sticks for a fun, festive presentation. The final result is a glossy, colorful, bite-sized confection perfect for parties and celebrations.
    Prep Time 20 minutes
    Cook Time 10 minutes
    Total Time 30 minutes
    Servings: 12
    Course: Main Course
    Cuisine: Halloween
    Calories: 150

    Ingredients
      

    • 2 cups cake crumbs crushed sponge cake or cookies
    • 0.5 cup frosting store-bought or homemade, enough to bind the crumbs
    • 8 oz chocolate dark, milk, or white, melted
    • mini candies, flavored syrups, or jam surprise fillings optional, for inside the cake pops
    • sprinkles, edible glitter, tiny candies decorations for decorating the coated pops
    • 12 sticks cake pop sticks wooden or paper sticks

    Equipment

    • Microwave or double boiler
    • Spoons or piping bag
    • Cake pop sticks
    • Parchment paper
    • Cooling rack

    Method
     

    1. Place the cake crumbs in a large bowl and stir in the frosting until the mixture is moist, crumbly but holds together when pressed.
    2. Use your hands or a scoop to shape the mixture into small, uniform balls, about 1 inch in diameter, and place them on a parchment-lined tray.
    3. Refrigerate the balls for about 15-20 minutes until they are firm and chilled, which helps them hold their shape during dipping.
    4. Meanwhile, melt the chocolate in a microwave in short bursts, stirring between each until smooth and glossy, or use a double boiler for gentle melting.
    5. Insert a cake pop stick into each chilled ball at a slight angle, then dip the tip into the melted chocolate to seal it in place.
    6. Gently dip each cake ball into the melted chocolate, swirling or tapping off excess, then place on a parchment-lined tray or cooling rack.
    7. While the chocolate is still wet, decorate the pops with sprinkles, edible glitter, or tiny candies for a festive, spooky look.
    8. Allow the coated cake pops to set at room temperature or in the refrigerator for about 30 minutes until the chocolate is firm and shiny.
    9. Once set, carefully remove the cake pops from the rack and serve them on a platter for a fun Halloween treat.

    Notes

    Keep the chocolate at the right consistency for dipping and work quickly to prevent melting or cracking. Chill the cake balls enough to handle comfortably but not so long that they become brittle.
    These cake pops are more than just treats; they’re little edible surprises that spark delight and curiosity. The process is messy, unpredictable, but that’s part of the charm. As you bite into one, the hidden center surprises with flavors or textures that make them worth the chaos.

  • Unconventional Halloween Cake Pops: A Spooky Twist with a Surprise Center

    Unconventional Halloween Cake Pops: A Spooky Twist with a Surprise Center

    This Halloween, I’m ditching the usual ghostly cookies and opting for something handheld, fun, and just a little bit spooky. Cake pops are perfect for that—they’re versatile, playful, and easy to customize with colors and surprises inside. Plus, they make a mess that’s totally worth it.

    Why I keep coming back to these Halloween cake pops

    They’re endlessly customizable, and each batch feels like a little ritual. I love the chaos of melting chocolate, the anticipation of dipping, and the surprise of what’s inside each one. Plus, they’re a hit at parties, sparking smiles and conversation. This recipe is my fallback when I need a sweet project that’s both fun and slightly unpredictable.

    Inside the spooky ingredients stash

    • Cake crumbs — I use day-old sponge, but crushed cookies work too. It’s the base that holds everything together.: Crumbs form the core and need to be moist enough to roll into balls but not sticky.
    • Chocolate — Dark, milk, or white, melted smooth. It’s the magic shell and glue.: Silky, melts easily, and sets firm with a shiny finish.
    • Surprise fillings — Mini candies, flavored syrups, or even a dollop of jam. Keep it fun and unexpected.: Adds a hidden burst of flavor or texture inside.
    • Decorations — Sprinkles, edible glitter, tiny candies. Make it festive and spooky.: Visual appeal and extra crunch or shimmer.
    • Cake pop sticks — Wooden or paper, sturdy enough to hold the weight.: Transforms treats into handheld moments of joy.

    Tools of the trade for spooky perfection

    • Double boiler or microwave: Gently melts chocolate without scorching.
    • Spoons or piping bag: Doles out chocolate precisely and neatly.
    • Cake pop sticks: Turns each treat into a handheld bundle of fun.
    • Parchment paper: Prevents sticking and keeps pops neat.
    • Cooling rack: Allows excess chocolate to drip off and cool evenly.

    Step-by-Step for Perfectly Spooky Cake Pops

    Step 1: Start by melting your chocolate in a heatproof bowl over a double boiler or in short bursts in the microwave, stirring between each. Aim for smooth, glossy consistency—if it’s dull or grainy, keep warming gently.

    Step 2: Use a small spoon or piping bag to dollop a bit of chocolate into each cake pop cavity, then add a hidden surprise like a mini candy or a splash of flavored syrup before sealing with more chocolate.

    Step 3: Insert a stick quickly, twisting slightly to secure, and gently tap off excess chocolate. Place on parchment to set in the fridge for about 30 minutes.

    Step 4: Once firm, dip each pop into the remaining melted chocolate, swirling to coat evenly. Add sprinkles or edible glitter while still wet for extra magic.

    Crisis averted: Tips to keep your cake pops flawless

    • Chocolate should be smooth and shiny, not dull or grainy.
    • Cake balls must be cold enough to hold shape, but not frozen hard.
    • Sticks should be inserted at a slight angle for stability.
    • Sprinkles or decorations should be added while the coating is still damp to stick well.

    Common Halloween cake pop pitfalls and how to dodge them

    • Chocolate seized or cooled too quickly.? CHOCOLATE IS DULL OR GRAINY — Keep chocolate warm but not hot, stir constantly, and use fresh chocolate if needed.
    • Not chilling enough before coating.? CAKE BALLS ARE TOO SOFT — Chill until firm, then handle gently to prevent cracking.
    • Inserting sticks into warm or soft cake.? STICKS FALL OUT — Insert at a slight angle, and dip into chocolate to secure.
    • Decorating too late.? DECORATIONS FALL OFF — Add sprinkles immediately after dipping, while coating is still wet.

    Halloween Cake Pops

    These Halloween cake pops are handheld treats made from moist cake crumbs bound with chocolate, then dipped in melted chocolate and decorated with spooky sprinkles. They have a fun, bite-sized appearance with a shiny coating and surprise fillings inside, perfect for parties and festive gatherings. The process involves melting chocolate, shaping, and decorating for a playful and delicious final result.
    Prep Time 30 minutes
    Cook Time 15 minutes
    Total Time 45 minutes
    Servings: 12
    Course: Main Course
    Cuisine: Halloween
    Calories: 150

    Ingredients
      

    • 2 cups cake crumbs day-old sponge or crushed cookies
    • 1 cup chocolate dark, milk, or white, melted smoothly
    • 0.5 cup surprise fillings mini candies, flavored syrups, or jam
    • 1 cup decorations sprinkles, edible glitter, tiny candies
    • 12 sticks cake pop sticks wooden or paper, sturdy enough

    Equipment

    • Double boiler or microwave
    • Spoons or piping bag
    • Cake pop sticks
    • Parchment paper
    • Cooling rack

    Method
     

    1. Place the chocolate in a heatproof bowl and melt it gently using a double boiler or short bursts in the microwave, stirring until smooth and glossy. The chocolate should feel silky and have a pleasant sheen.
    2. Using a small spoon or piping bag, dollop a spoonful of melted chocolate into each cavity of a cake pop mold or shape the mixture by hand if not using a mold. Add a mini candy or a splash of flavored syrup as a surprise inside each ball, then cover with more chocolate to seal.
    3. Quickly insert a cake pop stick into each chocolate-covered ball at a slight angle. Gently tap off any excess chocolate around the stick to help it stay secure. Place the formed pops on parchment paper or a cooling rack.
    4. Transfer the tray or rack to the fridge and chill for about 30 minutes, allowing the cake pops to firm up and become easy to handle.
    5. Once chilled and firm, dip each cake pop into the remaining melted chocolate, swirling gently to coat evenly. Tap off excess chocolate and place back on parchment paper or a rack.
    6. Decorate the coated cake pops immediately with sprinkles, edible glitter, or tiny candies while the coating is still wet, so they stick well and look festive.
    7. Allow the decorated cake pops to set at room temperature or in the fridge until the chocolate is firm and shiny, about 15-20 minutes. They are now ready to serve and enjoy!
    These cake pops are more than just treats; they’re little edible surprises that spark delight and curiosity. The process is messy, unpredictable, but that’s part of the charm. As you bite into one, the hidden center surprises with flavors or textures that make them worth the chaos.

  • Unconventional Halloween Cake Pops: A Spooky Twist with a Surprise Center

    Unconventional Halloween Cake Pops: A Spooky Twist with a Surprise Center

    This Halloween, I’m ditching the usual ghostly cookies and opting for something handheld, fun, and just a little bit spooky. Cake pops are perfect for that—they’re versatile, playful, and easy to customize with colors and surprises inside. Plus, they make a mess that’s totally worth it.

    Why I keep coming back to these Halloween cake pops

    They’re endlessly customizable, and each batch feels like a little ritual. I love the chaos of melting chocolate, the anticipation of dipping, and the surprise of what’s inside each one. Plus, they’re a hit at parties, sparking smiles and conversation. This recipe is my fallback when I need a sweet project that’s both fun and slightly unpredictable.

    Inside the spooky ingredients stash

    • Cake crumbs — I use day-old sponge, but crushed cookies work too. It’s the base that holds everything together.: Crumbs form the core and need to be moist enough to roll into balls but not sticky.
    • Chocolate — Dark, milk, or white, melted smooth. It’s the magic shell and glue.: Silky, melts easily, and sets firm with a shiny finish.
    • Surprise fillings — Mini candies, flavored syrups, or even a dollop of jam. Keep it fun and unexpected.: Adds a hidden burst of flavor or texture inside.
    • Decorations — Sprinkles, edible glitter, tiny candies. Make it festive and spooky.: Visual appeal and extra crunch or shimmer.
    • Cake pop sticks — Wooden or paper, sturdy enough to hold the weight.: Transforms treats into handheld moments of joy.

    Tools of the trade for spooky perfection

    • Double boiler or microwave: Gently melts chocolate without scorching.
    • Spoons or piping bag: Doles out chocolate precisely and neatly.
    • Cake pop sticks: Turns each treat into a handheld bundle of fun.
    • Parchment paper: Prevents sticking and keeps pops neat.
    • Cooling rack: Allows excess chocolate to drip off and cool evenly.

    Step-by-Step for Perfectly Spooky Cake Pops

    Step 1: Start by melting your chocolate in a heatproof bowl over a double boiler or in short bursts in the microwave, stirring between each. Aim for smooth, glossy consistency—if it’s dull or grainy, keep warming gently.

    Step 2: Use a small spoon or piping bag to dollop a bit of chocolate into each cake pop cavity, then add a hidden surprise like a mini candy or a splash of flavored syrup before sealing with more chocolate.

    Step 3: Insert a stick quickly, twisting slightly to secure, and gently tap off excess chocolate. Place on parchment to set in the fridge for about 30 minutes.

    Step 4: Once firm, dip each pop into the remaining melted chocolate, swirling to coat evenly. Add sprinkles or edible glitter while still wet for extra magic.

    Crisis averted: Tips to keep your cake pops flawless

    • Chocolate should be smooth and shiny, not dull or grainy.
    • Cake balls must be cold enough to hold shape, but not frozen hard.
    • Sticks should be inserted at a slight angle for stability.
    • Sprinkles or decorations should be added while the coating is still damp to stick well.

    Common Halloween cake pop pitfalls and how to dodge them

    • Chocolate seized or cooled too quickly.? CHOCOLATE IS DULL OR GRAINY — Keep chocolate warm but not hot, stir constantly, and use fresh chocolate if needed.
    • Not chilling enough before coating.? CAKE BALLS ARE TOO SOFT — Chill until firm, then handle gently to prevent cracking.
    • Inserting sticks into warm or soft cake.? STICKS FALL OUT — Insert at a slight angle, and dip into chocolate to secure.
    • Decorating too late.? DECORATIONS FALL OFF — Add sprinkles immediately after dipping, while coating is still wet.

    Halloween Cake Pops

    These Halloween cake pops are handheld treats made by shaping cake crumbs into balls, adding surprises, and coating them in shiny melted chocolate. They have a fun, festive appearance with sprinkles and edible glitter, perfect for parties and celebrations. The process involves melting chocolate, assembling with surprises, and decorating to create a playful, spooky dessert.
    Prep Time 30 minutes
    Total Time 1 hour
    Servings: 12
    Course: Main Course
    Cuisine: American
    Calories: 150

    Ingredients
      

    • 2 cups cake crumbs day-old sponge or crushed cookies
    • 1/2 cup chocolate dark, milk, or white chocolate, melted
    • 1/4 cup surprise fillings mini candies, flavored syrups, or jam
    • 1 cake pop sticks wooden or paper sticks
    • Sprinkles decorations edible glitter, tiny candies

    Equipment

    • Double boiler or microwave
    • Spoons or piping bag
    • Cake pop sticks
    • Parchment paper
    • Cooling rack

    Method
     

    1. Start by melting your chocolate in a heatproof bowl over a double boiler or in short bursts in the microwave, stirring until smooth and glossy. The chocolate should be silky and shiny—if it looks dull, keep warming gently.
    2. Use a spoon or piping bag to dollop a small amount of melted chocolate into each cavity of your cake crumb mixture, then nestle a surprise mini candy or a splash of flavored syrup inside each one. Cover with more cake crumbs to seal the surprises inside.
    3. Gently roll the mixture into balls, about the size of a golf ball, making sure each is firm and well-shaped. Place a cake pop stick into each ball at a slight angle, pressing gently to secure.
    4. Place the assembled cake pops on a parchment-lined tray and chill in the refrigerator for about 30 minutes until they’re firm and cold. This helps them hold their shape during coating.
    5. Once chilled, dip each cake pop into the melted chocolate, swirling gently to coat evenly. Tap off excess chocolate and place the coated pops on a cooling rack.
    6. Add sprinkles, edible glitter, or tiny candies onto the wet coating immediately after dipping for a festive and spooky look. Let the chocolate set completely at room temperature or in the fridge.
    7. Once the coating is firm and shiny, carefully remove the cake pops from the rack. Serve immediately or store in an airtight container until ready to enjoy.

    Notes

    Ensure chocolate is melted smoothly and not overheated. Chill the cake balls thoroughly before dipping to prevent cracking. Add decorations while the coating is still wet for best adhesion.
    These cake pops are more than just treats; they’re little edible surprises that spark delight and curiosity. The process is messy, unpredictable, but that’s part of the charm. As you bite into one, the hidden center surprises with flavors or textures that make them worth the chaos.

  • Monster Rice Krispie Treats: A Chaos of Chocolate and Marshmallow Magic

    Monster Rice Krispie Treats: A Chaos of Chocolate and Marshmallow Magic

    Monster Rice Krispie Treats are my chaos in the kitchen—a wild mash-up of chocolate, marshmallow, and crispy cereal. I love how they turn out imperfectly perfect, with gooey edges and crispy bites that make you want to grab another. It’s a recipe that’s forgiving, fun, and a little bit rebellious against the tidy, predictable treats.

    Why this chaos keeps calling me back

    They remind me of childhood, the messy kitchen afternoons, and the thrill of making something wildly imperfect. Every batch feels like a small act of rebellion—crunchy, sticky, and just a little wild. Each time I make them, I forget the rules and embrace the chaos.

    Breaking down the ingredients of chaos

    • Crispy rice cereal: The backbone of the treat, brings the crunch, needs to be fresh for maximum crispness.
    • Marshmallows: Sweet, gooey magic—use mini for easier melting, but large can work if broken down.
    • Butter: Adds richness and helps everything stick together—unsalted is best, but salted works if you like a savory edge.
    • Chocolate chips (optional): For a melty, smoky sweetness—toss in before mixing or drizzle on top after.
    • Vanilla extract (optional): A splash boosts sweetness and adds depth—skip if you’re feeling minimalist.
    • Sprinkles or candies (optional): For visual chaos—sprinkle on before setting or press into the mixture.

    Tools and equipment for monster rice krispie chaos

    • Large mixing bowl: To hold and mix all the ingredients comfortably.
    • Medium saucepan: For melting butter and marshmallows evenly.
    • Spatula: To stir and combine ingredients without breaking the marshmallow goo.
    • 9×13 inch pan: To set and cut the treats into squares.
    • Parchment paper: To prevent sticking and make cleanup easier.

    Step-by-step for the most chaotic, delicious monster rice krispie treats

    Step 1: Gather a large mixing bowl and a sturdy spatula. You’ll also need a microwave-safe bowl for melting butter and marshmallows.

    Step 2: Melt 1/2 cup butter in a large pot over medium heat, about 5 minutes, until it smells nutty and golden.

    Step 3: Add 4 cups mini marshmallows and stir continuously until they’re gooey, shiny, and just melted—about 3 minutes.

    Step 4: Pour in 6 cups crispy rice cereal. Mix quickly and thoroughly, making sure every puff is coated in marshmallow goo.

    Cooking checkpoints and tips to keep your monster treats perfect

    • The marshmallow mixture should be shiny and gooey, not browned or lumpy.
    • The cereal needs to be coated evenly but not soggy—stop mixing once everything looks well combined.
    • The treats should set with a firm, but not hard, texture—give them 30 minutes at room temperature.

    Common mistakes and how to fix them

    • Using too little marshmallow or overcooking the mixture.? Add more marshmallows if the mixture is too dry and crumbly.
    • Burning the marshmallow mixture.? Reduce heat or add a splash of water if marshmallows scorch.
    • Treats falling apart when cutting.? Press treats firmly into pan to prevent crumbling.
    • Cutting while still warm and sticky.? Let treats cool completely before cutting.

    Monster Rice Krispie Treats

    Monster Rice Krispie Treats are a playful and chaotic dessert combining melted marshmallows, butter, and crispy rice cereal into a sticky, crunchy snack. The mixture is stirred until gooey and coated, then pressed into a pan to set into imperfectly perfect squares with crispy edges and chewy centers. These treats are messy, fun, and irresistibly addictive.
    Prep Time 10 minutes
    Cook Time 10 minutes
    Total Time 20 minutes
    Servings: 12
    Course: Main Course
    Cuisine: American
    Calories: 150

    Ingredients
      

    • 1/2 cup unsalted butter or salted, if preferred
    • 4 cups mini marshmallows
    • 6 cups crispy rice cereal fresh for maximum crunch
    • 1/2 cup chocolate chips optional, for melty sweetness
    • 1 teaspoon vanilla extract optional, boosts sweetness
    • Sprinkles or candies optional decorations for visual chaos

    Equipment

    • Large mixing bowl
    • Medium saucepan
    • Spatula
    • 9×13 inch pan
    • Parchment paper

    Method
     

    1. Line your 9×13 inch pan with parchment paper to prevent sticking and make cleanup easier.
    2. Melt the butter in a medium saucepan over medium heat, listening for a gentle bubbling and smelling nutty as it turns golden, about 3-5 minutes.
    3. Add the mini marshmallows to the melted butter and stir continuously with a spatula until they are shiny, gooey, and just melted, about 3 minutes. The mixture should be smooth and bubbling softly.
    4. Remove the saucepan from heat and quickly pour in the vanilla extract and, if using, the chocolate chips. Stir until the chocolate melts into the marshmallow mixture, creating a glossy, sticky goo.
    5. Pour the crispy rice cereal into the marshmallow mixture and fold gently with a spatula until every puff is coated in the gooey mixture. Be careful not to crush the cereal—just fold until uniform.
    6. Transfer the mixture into your prepared pan and press it evenly with the back of a spatula or your hands (using parchment to avoid sticking). Don’t press too hard—just enough to compact the treats into an even layer.
    7. If desired, sprinkle colorful candies or sprinkles on top and press lightly to embed them into the surface for a chaotic, decorative effect.
    8. Let the treats cool at room temperature for at least 30 minutes until they set and firm up. You’ll hear a satisfying crack when you press on the edges.
    9. Once cooled, lift the treats out of the pan using the parchment paper and cut into squares or irregular shapes for that rebellious chaos look.
    10. Serve immediately or store in an airtight container for up to 3 days, enjoying the sticky, crispy texture and sweet, gooey flavor with every bite.

    Notes

    Feel free to customize with your favorite candies or add extra chocolate for more chaos. For even more gooeyness, add a few more marshmallows or melt some chocolate and drizzle on top after setting.
    These treats aren’t just snacks; they’re a tiny rebellion against the neatness of traditional desserts. The messier, the better—every sticky bite packed with flavor and chaos. Let them set for 30 minutes, then cut into uneven squares—each one a little masterpiece of sweetness and crunch. Enjoy with a glass of cold milk, or just a spoonful straight from the pan.

  • Monster Rice Krispie Treats: A Chaos of Chocolate and Marshmallow Magic

    Monster Rice Krispie Treats: A Chaos of Chocolate and Marshmallow Magic

    Monster Rice Krispie Treats are my chaos in the kitchen—a wild mash-up of chocolate, marshmallow, and crispy cereal. I love how they turn out imperfectly perfect, with gooey edges and crispy bites that make you want to grab another. It’s a recipe that’s forgiving, fun, and a little bit rebellious against the tidy, predictable treats.

    Why this chaos keeps calling me back

    They remind me of childhood, the messy kitchen afternoons, and the thrill of making something wildly imperfect. Every batch feels like a small act of rebellion—crunchy, sticky, and just a little wild. Each time I make them, I forget the rules and embrace the chaos.

    Breaking down the ingredients of chaos

    • Crispy rice cereal: The backbone of the treat, brings the crunch, needs to be fresh for maximum crispness.
    • Marshmallows: Sweet, gooey magic—use mini for easier melting, but large can work if broken down.
    • Butter: Adds richness and helps everything stick together—unsalted is best, but salted works if you like a savory edge.
    • Chocolate chips (optional): For a melty, smoky sweetness—toss in before mixing or drizzle on top after.
    • Vanilla extract (optional): A splash boosts sweetness and adds depth—skip if you’re feeling minimalist.
    • Sprinkles or candies (optional): For visual chaos—sprinkle on before setting or press into the mixture.

    Tools and equipment for monster rice krispie chaos

    • Large mixing bowl: To hold and mix all the ingredients comfortably.
    • Medium saucepan: For melting butter and marshmallows evenly.
    • Spatula: To stir and combine ingredients without breaking the marshmallow goo.
    • 9×13 inch pan: To set and cut the treats into squares.
    • Parchment paper: To prevent sticking and make cleanup easier.

    Step-by-step for the most chaotic, delicious monster rice krispie treats

    Step 1: Gather a large mixing bowl and a sturdy spatula. You’ll also need a microwave-safe bowl for melting butter and marshmallows.

    Step 2: Melt 1/2 cup butter in a large pot over medium heat, about 5 minutes, until it smells nutty and golden.

    Step 3: Add 4 cups mini marshmallows and stir continuously until they’re gooey, shiny, and just melted—about 3 minutes.

    Step 4: Pour in 6 cups crispy rice cereal. Mix quickly and thoroughly, making sure every puff is coated in marshmallow goo.

    Cooking checkpoints and tips to keep your monster treats perfect

    • The marshmallow mixture should be shiny and gooey, not browned or lumpy.
    • The cereal needs to be coated evenly but not soggy—stop mixing once everything looks well combined.
    • The treats should set with a firm, but not hard, texture—give them 30 minutes at room temperature.

    Common mistakes and how to fix them

    • Using too little marshmallow or overcooking the mixture.? Add more marshmallows if the mixture is too dry and crumbly.
    • Burning the marshmallow mixture.? Reduce heat or add a splash of water if marshmallows scorch.
    • Treats falling apart when cutting.? Press treats firmly into pan to prevent crumbling.
    • Cutting while still warm and sticky.? Let treats cool completely before cutting.

    Monster Rice Krispie Treats

    Monster Rice Krispie Treats are a playful, chaotic mix of crispy cereal, gooey marshmallows, and melty chocolate, creating a treat with a sticky, crunchy, and slightly messy texture. The recipe involves melting butter and marshmallows, then folding in cereal and optional add-ins before setting in a pan. Once cooled, they form imperfectly perfect squares that are both nostalgic and fun to eat.
    Prep Time 10 minutes
    Cook Time 10 minutes
    Total Time 20 minutes
    Servings: 12
    Course: Main Course
    Cuisine: American
    Calories: 150

    Ingredients
      

    • 1/2 cup unsalted butter or salted, if preferred
    • 4 cups mini marshmallows or broken large marshmallows
    • 6 cups crispy rice cereal fresh for maximum crunch
    • 1/2 cup chocolate chips optional, for melty sweetness
    • 1 teaspoon vanilla extract optional, for depth of flavor
    • Sprinkles or candies optional decorations for visual chaos

    Equipment

    • Large mixing bowl
    • Medium saucepan
    • Spatula
    • 9×13 inch pan
    • Parchment paper

    Method
     

    1. Line your 9×13 inch pan with parchment paper to prevent sticking and set aside.
    2. Melt the butter in a medium saucepan over medium heat, stirring occasionally until it smells nutty and turns a light golden color, about 3-5 minutes.
    3. Add the mini marshmallows to the melted butter and stir continuously, watching as they melt into a shiny, gooey mixture. Keep stirring until completely melted and smooth, about 3 minutes.
    4. Remove the saucepan from heat and stir in the vanilla extract, if using. This enhances the sweetness and adds a subtle depth of flavor.
    5. Pour the crispy rice cereal into the marshmallow mixture. Quickly fold everything together with a spatula until all the cereal is evenly coated and shiny with marshmallow goo.
    6. If desired, sprinkle in chocolate chips or candies and gently fold them into the mixture, distributing evenly for bursts of sweetness and colorful chaos.
    7. Transfer the mixture into the prepared pan and press down firmly with a spatula or your fingers to create an even, compact layer. Don’t press too hard—just enough to set everything in place.
    8. Let the treats cool at room temperature for about 30 minutes, allowing them to set and become firm but still chewy.
    9. Once cooled, lift the treats out of the pan using the parchment paper and cut into squares or irregular shapes for that wild, rebellious look.
    10. Enjoy your imperfect, chaotic Monster Rice Krispie Treats — crunchy, sticky, and full of fun!

    Notes

    Feel free to customize with your favorite add-ins like nuts, caramel bits, or different colored sprinkles to make each batch uniquely chaotic.
    These treats aren’t just snacks; they’re a tiny rebellion against the neatness of traditional desserts. The messier, the better—every sticky bite packed with flavor and chaos. Let them set for 30 minutes, then cut into uneven squares—each one a little masterpiece of sweetness and crunch. Enjoy with a glass of cold milk, or just a spoonful straight from the pan.