Veggie balls often get a bad rap for being mushy or bland, but mastering the texture is what makes them stand out. I’ve spent years tweaking the process, aiming for that perfect balance of a crispy exterior with a tender, almost meaty inside. It’s a weird satisfaction to bite into one and get that crackle, then the chew that’s just right.
This recipe isn’t just about making something healthy or vegetarian; it’s about the tactile joy of eating. The crunch on the outside, the juicy, well-seasoned interior—each bite is a little dance of textures. It’s a reminder that even humble ingredients can turn into a satisfying experience if you pay attention to how they come together.
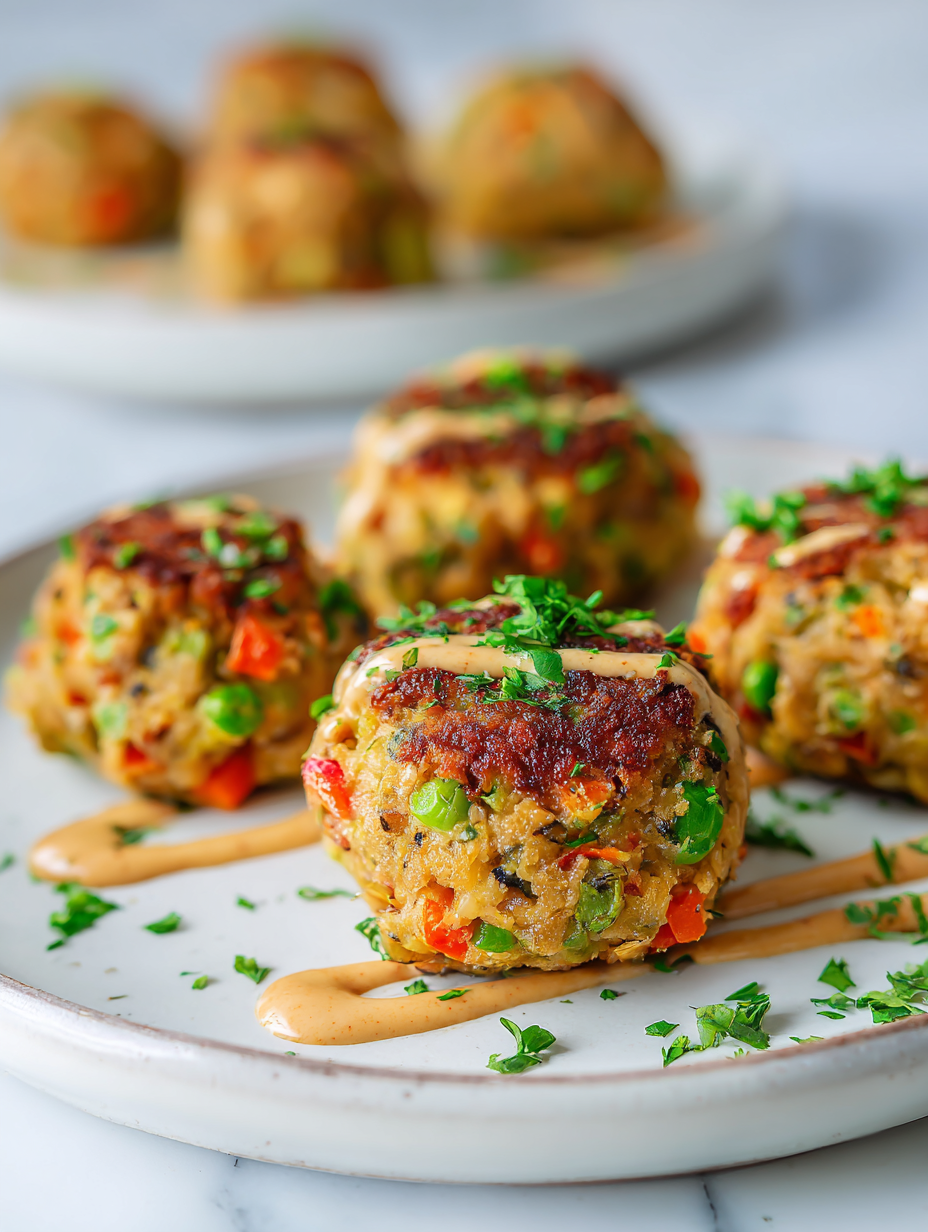
Focusing on the overlooked art of balancing textures—crisp edges with tender insides—in veggie balls, turning a humble dish into a satisfying, multi-sensory experience.
The textural magic of veggie balls
- There’s a quiet thrill in turning humble veggies into something that feels indulgent, especially when they sizzle and crackle in the pan.
- I remember the first time I got the texture just right—crisp outside, tender inside—and it made me feel like I finally cracked the code.
- Cooking these veggie balls is chaos—messy, loud, but oddly satisfying when I see everyone reaching for seconds.
- These remind me of childhood, sneaking bites of crispy veggie bites after school, feeling a little rebellious and very thankful.
- Sometimes it’s the small victories—perfectly browned edges—that make me proud of my imperfect kitchen skills.
The story behind this recipe
- This recipe started as a way to use up leftover vegetables from my fridge, but it quickly became about more than just saving scraps. It’s about transforming humble ingredients into something exciting, with a satisfying crunch and tender insides that make you forget they’re just veggie-based. I remember the first batch that actually held together without falling apart—felt like a small victory in the chaotic world of home cooking.
- Over the years, I’ve played with different veggies, spices, and binding agents, chasing that perfect bite—crispy outside, juicy inside. It’s honestly a little addictive, the way each batch teaches you a bit more about balance and patience. These veggie balls aren’t just food; they’re a reminder that with a little effort, simple ingredients can surprise you.
- heading: The art of balancing textures
Historical and Cultural Roots
- Veggie balls have roots in many traditional cuisines, often as a way to stretch ingredients and add texture.
- This dish gained popularity in vegetarian and vegan circles during the 1960s and 70s, as plant-based eating became more mainstream.
- The concept of forming vegetables into balls or patties can be traced back to ancient recipes across the Mediterranean and Middle East.
Key ingredients and tips
- Carrots: I love the slight sweetness and vibrant orange hue they bring—make sure to grate them finely so the mixture holds together well. If too coarse, the balls feel gritty; if grated too fine, they lose their bite.
- Chickpeas: Canned chickpeas are my go-to—they mash easily and add a creamy texture. For a nuttier flavor, try lightly roasting dried chickpeas beforehand, but watch out for their smoky aroma, which can be overpowering.
- Breadcrumbs: I prefer panko for extra crunch, but regular breadcrumbs work fine. Toast them lightly if you want a deeper, toasted flavor that contrasts nicely with the tender insides.
- Herbs & Spices: Fresh parsley and a pinch of smoked paprika are my favorites—they add brightness and a subtle smoky kick. Dried herbs can be used, but they won’t give the same lively aroma during cooking.
- Binding Agents: A beaten egg binds everything together, helping the balls hold their shape. For a vegan version, try flaxseed meal mixed with water, which creates a slightly nutty, chewy texture—just be aware it might be a tad denser.
- Olive Oil: I use a good splash for pan-frying; it crisps up the outside beautifully and adds a fruity aroma. If you prefer a milder flavor, try avocado oil—just keep an eye on the heat to prevent smoking.
- Lemon Juice: I add a squeeze for brightness—its zesty tang cuts through the richness of the fried exterior. Skip if you want a more subdued, earthy profile, but honestly, it’s the little splash that lifts the whole dish.
Spotlight on key ingredients
Carrots:
- I love their natural sweetness and vibrant orange hue. Grate them finely to avoid a gritty texture; too coarse and they can make the mixture feel chunky.
- Chickpeas: Canned chickpeas mash effortlessly and add a creamy, slightly nutty flavor. For a smoky twist, lightly roast dried chickpeas beforehand—watch out for their strong aroma.
Breadcrumbs & Herbs:
- Breadcrumbs: Panko give the veggie balls an irresistible crunch, but regular breadcrumbs work too. Toast them lightly for a deeper, toasted flavor that contrasts the tender insides.
- Herbs & Spices: Fresh parsley and smoked paprika add brightness and warmth. Dried herbs can be used in a pinch but lack the lively aroma of fresh.
Notes for ingredient swaps
- Dairy-Free: Use nutritional yeast instead of cheese for umami, or skip entirely for a cleaner taste.
- Gluten-Free: Swap regular breadcrumbs for almond meal or crushed rice crackers—texture will be slightly different but still satisfying.
- Vegan: Replace egg with flaxseed meal mixed with water—will be denser, but binds well if chilled properly.
- Nut-Free: Omit nuts or nut-based ingredients; focus on veggies and herbs for flavor and texture.
- Herb Variations: Fresh basil or cilantro can replace parsley for different bright, aromatic notes.
- Spice Level: Add cayenne or chili flakes if you like a kick—smoky paprika pairs well, too, for depth.
- Oil Choice: Use light sesame or avocado oil for different aroma profiles; maintain medium heat to avoid smoking.
Equipment & Tools
- Large mixing bowl: To combine all ingredients thoroughly.
- Grater: To finely grate carrots for even texture.
- Skillet or frying pan: For frying the veggie balls evenly.
- Spatula: To turn and handle the veggie balls during cooking.
- Paper towels: To drain excess oil after frying.
Step-by-step guide to veggie balls
- Gather all ingredients: grated carrots, mashed chickpeas, breadcrumbs, herbs, egg, lemon juice, and oil. Have a large mixing bowl ready.
- In the bowl, combine the grated carrots and mashed chickpeas. Mix thoroughly until evenly distributed.
- Add breadcrumbs, chopped parsley, smoked paprika, salt, and pepper. Mix again, then stir in the beaten egg and lemon juice. The mixture should be tacky but hold together. If too loose, sprinkle in a bit more breadcrumbs.
- Preheat a large skillet over medium heat, about 180°C (355°F). Add a generous splash of olive oil and let it shimmer.
- Using your hands, scoop about 2 tablespoons of mixture and roll into balls roughly 3 cm (1.2 inches) in diameter. Place them on a plate or tray as you go.
- Carefully place the veggie balls into the hot pan, giving space between each. Cook for 4-5 minutes per side, turning until golden brown and crispy. Adjust heat if they brown too fast or burn.
- Check the first batch: they should be evenly browned with a crackly exterior and a firm but tender inside. If they stick or fall apart, adjust the oil or chill the mixture briefly before cooking.
- Once all are browned, transfer to a paper towel-lined plate to drain excess oil. Let rest for 2 minutes.
- Serve hot, with a squeeze of lemon or your favorite dipping sauce. For best texture, eat within 10 minutes of frying.
Let the veggie balls rest for a couple of minutes after frying. Serve immediately, garnished with herbs or a squeeze of lemon for brightness. For a crispier finish, you can briefly bake them at 200°C (390°F) for 5 minutes, but best enjoyed fresh for maximum crunch.
How to Know It’s Done
- Golden, crispy exterior with crackle sound when pressed.
- Interior feels tender but holds shape when gently squeezed.
- Color should be evenly browned, not burnt or pale.
Crispy Texture Veggie Balls
Ingredients
Equipment
Method
- Gather all your ingredients: grated carrots, mashed chickpeas, breadcrumbs, herbs, egg, lemon juice, and oil. Set a large mixing bowl nearby for combining.
- Add the grated carrots and mashed chickpeas into the bowl. Mix thoroughly with a spoon or your hands until they are evenly combined and form a cohesive base.
- Stir in the breadcrumbs, chopped parsley, smoked paprika, salt, and pepper. Continue mixing until well incorporated, creating a slightly sticky mixture that holds together.
- Pour in the beaten egg and lemon juice, then mix again. The mixture should be tacky but manageable. If it feels too loose, sprinkle in a little more breadcrumbs.
- Preheat your skillet over medium heat and add two tablespoons of olive oil. Let the oil shimmer and heat up until it starts to ripple gently.
- Using your hands, scoop about two tablespoons of mixture and roll into a ball roughly 3 cm in diameter. Place each ball on a plate or tray as you go.
- Carefully place the veggie balls into the hot skillet, spacing them evenly. Cook for about 4-5 minutes on each side, turning gently with a spatula until they are golden and crispy on the outside.
- Check the first batch: they should be evenly browned, with a crackly exterior and a tender interior when pressed lightly. Adjust heat if necessary to prevent burning.
- Transfer the cooked veggie balls onto paper towels to drain excess oil. Let them rest for a couple of minutes to set their crispy crust.
- Serve the veggie balls hot, garnished with extra parsley or a squeeze of lemon for added brightness. Enjoy their crispy exterior and tender inside in every satisfying bite.
Pro tips for perfect veggie balls
- Use panko breadcrumbs: They create a crispier exterior than regular breadcrumbs, especially if lightly toasted.
- Chill the mixture: Let the veggie mixture rest in the fridge for 15-20 minutes before shaping—this makes it easier to handle and helps the balls hold their shape.
- Don’t overcrowd the pan: Fry in batches, leaving space between each ball, to ensure even cooking and crispiness.
- Adjust heat carefully: Medium heat (around 180°C/355°F) gives a golden exterior without burning the outside before the inside cooks.
- Test for doneness: The balls should be golden and crackly on the outside, with a tender, just-set interior—use a spatula to gently press and check texture.
- Use a neutral oil: Olive oil is great, but if you want a lighter option, avocado or light sesame oil won’t overpower the veggie flavors.
- Flip carefully: Use a spatula or tongs to turn the balls gently to keep their shape and prevent breaking during frying.
Common mistakes and how to fix them
- FORGOT to adjust heat if balls brown too quickly—reduce to prevent burning.
- DUMPED in too many balls at once—work in batches for even crispiness.
- OVER-TORCHED the first side—turn sooner for golden, not burnt, exterior.
- DIDN’T test for doneness—use a small crack to check for a tender inside.
Quick Fixes & Pantry Swaps
- If balls stick, splash a little water on your hands before shaping.
- When mixture feels too dry, open a splash of water or a drizzle of oil to loosen.
- Splash a tiny bit of vinegar if the oil shimmers too much and smoke rises.
- Patch cracks by pressing the mixture back together immediately during frying.
- Shield burnt edges with a paper towel or lower heat instantly to prevent bitterness.
Prep, store, and reheat tips
- Prepare the veggie mixture and shape the balls up to a day in advance; keep covered in the fridge to preserve freshness and moisture.
- Store cooked veggie balls in an airtight container in the fridge for up to 3 days. Reheat in a hot skillet or oven until crispy and warmed through, about 5-7 minutes, until they shimmer with a slight crackle.
- For longer storage, freeze uncooked or cooked veggie balls for up to 1 month. Thaw in the fridge overnight before reheating, or cook directly from frozen—just add an extra minute to cooking time.
- Reheating can cause the exterior to soften; for best texture, reheat in a 200°C (390°F) oven or skillet, watching for that initial shimmer and crackle, which signals they’re ready to eat.
Top Questions About Veggie Balls
1. How do I prevent the veggie balls from falling apart?
Use a fine grater for carrots to ensure they don’t make the mixture gritty. Coarse grating can ruin the texture.
2. Can I make the mixture ahead of time?
Chill the mixture for 15-20 minutes before shaping. Cold mixture sticks together better and results in crispier edges.
3. What’s the best breadcrumb type to use?
Use panko breadcrumbs for extra crunch. Regular breadcrumbs work but won’t give quite the same crispy exterior.
4. How do I know when they are cooked properly?
Cook the veggie balls over medium heat, around 180°C (355°F), until golden and crackly outside. Check for tenderness inside.
5. Can I make these vegan?
To veganize, replace the egg with flaxseed meal mixed with water. It helps bind, but the texture might be a bit denser.
6. How do I store leftovers?
Freeze unbaked veggie balls for up to a month. Thaw in the fridge overnight, then fry or bake straight from frozen.
7. What’s the best way to reheat?
Reheat in a hot skillet or oven until they shimmer and crackle, about 5-7 minutes. They should be crispy again.
8. How can I serve these for more flavor?
For extra flavor, toss cooked veggie balls in a spicy tomato sauce or serve with a tangy yogurt dip.
9. Can I substitute fresh herbs?
Use fresh herbs like parsley or cilantro for a bright aroma. Dried herbs can work but lack the fresh vibrancy.
10. My mixture is too sticky or dry, what do I do?
If mixture feels too dry, add a splash of water or a drizzle of oil. For too wet, sprinkle in more breadcrumbs.
These veggie balls might seem simple, but they carry a surprising amount of satisfaction when you get that perfect crunch and tender interior. They’re a reminder that humble ingredients, handled with care, can deliver bold textures and honest flavors. Sometimes, it’s these small kitchen experiments that make the everyday feel a little more intentional.
Sharing this recipe feels like passing on a secret to those moments when you want something cozy yet lively. Whether it’s a quick snack or part of a bigger meal, they’ve become my go-to for turning leftover veggies into something worth savoring. And honestly, I still get a tiny thrill every time I hear that crackle in the pan.

Welcome to Exploreing New Tastes. I’m really glad you found your way here. I’m a food blogger driven by curiosity more than perfection. I think about flavors constantly, how they change across cultures, how a small tweak can completely shift a dish, and how food tells stories long before anyone sits down to eat. This blog is where I document that curiosity, one recipe and one experience at a time.