Potato fritters have this uncanny way of pulling me straight back to childhood afternoons. My grandma’s kitchen was filled with the scent of crispy edges and tender insides, all golden and steaming hot. It’s funny how a simple batter and a hot pan can spark so many memories, right along with that satisfying crunch.
But over the years, I’ve played around with the classic, trying to find that perfect balance between a crispy exterior and a soft, fluffy center. It’s not just about nostalgia—every batch is a little experiment in texture and flavor. Sometimes, I toss in a pinch of spice or a handful of herbs, just to keep things interesting.
Making potato fritters isn’t complicated, but mastering the art of frying them just right takes a bit of patience. It’s that slow, attentive process where you watch the color change and listen for the crackle, feeling like you’re bringing a piece of your childhood back to life with every batch.
Focusing on how potato fritters can be a nostalgic comfort food that sparks memories of childhood, while also exploring creative twists and the importance of balancing crispiness with tender insides in every batch.
Rediscovering Childhood Comfort
- Cooking these reminds me of lazy Sunday mornings at my parents’ house, where the smell of frying potatoes filled every corner.
- There’s a weird thrill in flipping them just right—perfectly golden, with that satisfying sizzle echoing in the kitchen.
- Sharing these fritters with friends always sparks stories and laughter, making simple food feel like a celebration.
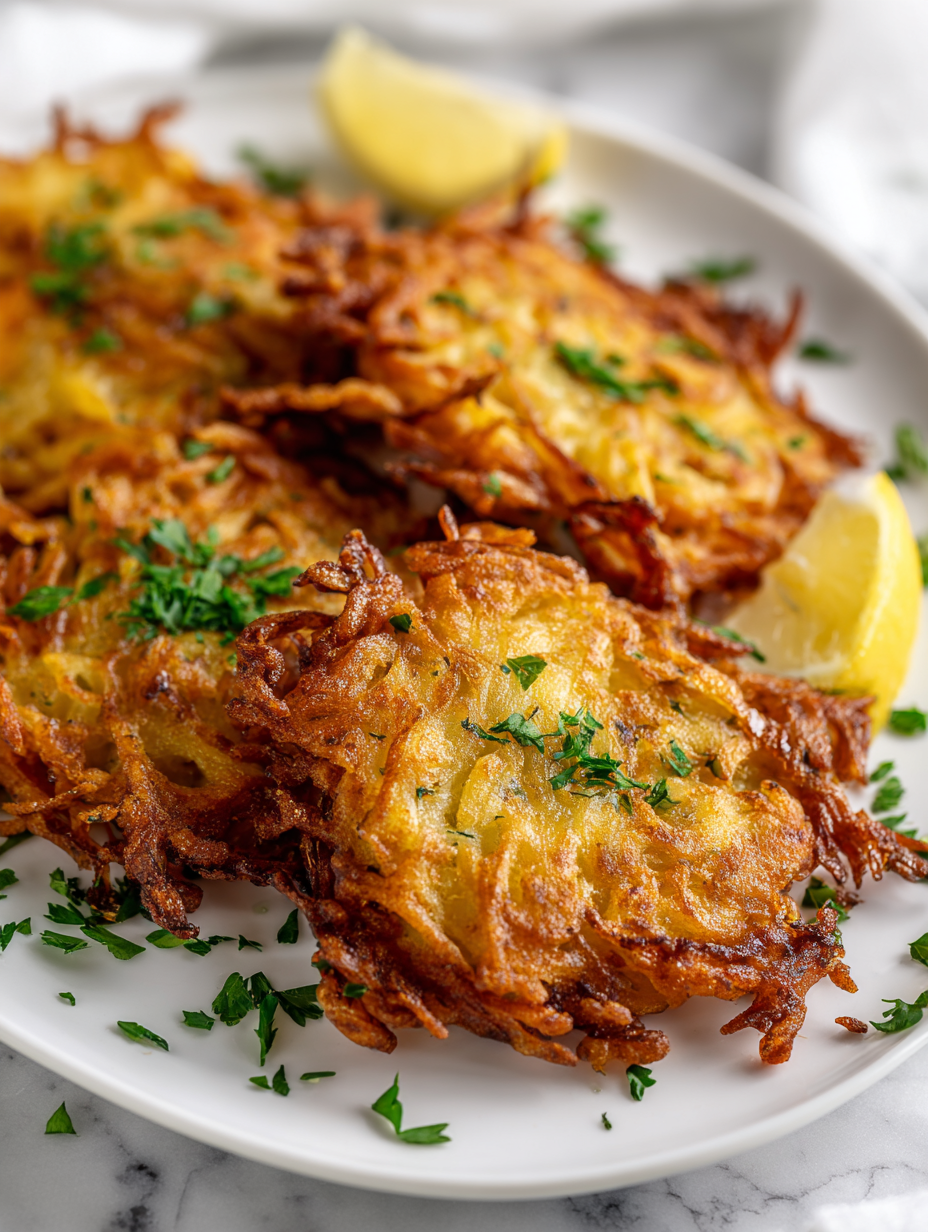
- I feel a quiet pride when I see a plate of crispy fritters — like I’ve captured a piece of comfort that’s timeless.
Rediscovering Childhood Comfort
Making potato fritters has always been my way of holding onto those lazy Sunday afternoons from childhood. My grandma’s kitchen was filled with the scent of sizzling potatoes and her laughter, which somehow made everything taste better. Over the years, I’ve tweaked her method, always chasing that perfect crunch and tender inside, a little bit nostalgic, a little bit personal. It’s funny how a simple fritter can carry so many memories and still feel like a fresh experiment every time I fry a batch.
Historical Roots of Potato Fritters
- Potato fritters date back centuries, with roots in peasant cuisines across Eastern Europe and Asia, where humble ingredients turned into comfort food.
- In some cultures, fritters were a way to stretch scarce ingredients, turning leftover potatoes into a crispy, satisfying snack or meal.
- The technique of frying small batches in hot oil likely evolved independently in many regions, each adding their unique spices and herbs.
- Despite their global presence, each culture has its own name and variation, from latkes to pakoras to croquettes, reflecting local tastes and traditions.
Ingredient breakdown
- Russet potatoes: I love using these for their fluffy interior and earthy flavor. If you prefer a creamier bite, go for Yukon Gold instead.
- Onion: Adds a gentle sweetness and moisture; I keep mine finely chopped so it distributes evenly. Skip if you want a cleaner potato flavor.
- Flour: I rely on all-purpose flour for structure, but rice flour gives a crisper edge if you want crunchier fritters—try it for a different texture.
- Egg: Binds everything together, giving the fritters a tender inside. For a vegan version, substitute with mashed banana or flaxseed meal—just expect a different flavor.
- Seasoning: Salt, pepper, maybe a pinch of paprika or herbs—these brighten the flavor. Adjust to taste, especially if your potatoes are on the bland side.
- Oil: I prefer neutral oils like sunflower or canola for frying—hot enough (around 180°C/355°F) and ready when it shimmers. Avoid overheating to prevent smoking.
- Optional extras: Garlic, chives, or cheese—think of these as little surprises that make each batch unique. I add a handful of chopped chives for a fresh hit.
Spotlight on key ingredients
Russet potatoes:
- I love using these for their fluffy interior and earthy flavor. If you prefer a creamier bite, go for Yukon Gold instead.
- Onion: Adds a gentle sweetness and moisture; I keep mine finely chopped so it distributes evenly. Skip if you want a cleaner potato flavor.
- Flour: I rely on all-purpose flour for structure, but rice flour gives a crisper edge if you want crunchier fritters—try it for a different texture.
Egg and seasonings:
- Egg: Binds everything together, giving the fritters a tender inside. For a vegan version, substitute with mashed banana or flaxseed meal—just expect a different flavor.
- Seasoning: Salt, pepper, maybe a pinch of paprika or herbs—these brighten the flavor. Adjust to taste, especially if your potatoes are on the bland side.
Notes for ingredient swaps
- Dairy-Free: Use unsweetened coconut yogurt instead of eggs for binding—adds a subtle coconut flavor.
- Gluten-Free: Swap all-purpose flour for rice flour or cornstarch—these give a lighter, crispier crust.
- Vegan: Replace eggs with mashed banana or flaxseed meal mixed with water—expect a slightly denser fritter.
- Low-Sodium: Omit or reduce salt; boost flavor with fresh herbs or a squeeze of lemon after frying.
- Herb Variations: Add chopped parsley or dill instead of chives—fresh herbs brighten the overall taste.
- Oil Choices: Use light olive oil or avocado oil for a richer flavor or higher smoke point—keep an eye on the heat.
- Add-Ins: Mix in grated zucchini or carrots for extra moisture and sweetness—adjust seasoning accordingly.
Equipment & Tools
- Large mixing bowl: Combine ingredients and mix thoroughly.
- Grater or food processor: Shred potatoes evenly and quickly.
- Frying pan or cast-iron skillet: Cook fritters evenly with good heat retention.
- Spatula: Flip and remove fritters safely from oil.
- Paper towels: Drain excess oil after frying.
- Cooking thermometer: Maintain consistent oil temperature.
Step-by-step guide to potato fritters
- Equipment & Tools: Prepare a large mixing bowl for ingredients, a grater or food processor for potatoes, a frying pan or cast-iron skillet, a spatula, and paper towels for draining excess oil.
- Peel and grate 3 large russet potatoes, then place them in a clean kitchen towel and squeeze out excess moisture—this is crucial for crispiness.
- Finely chop 1 small onion and set aside. In the mixing bowl, combine grated potatoes, onion, 2 beaten eggs, 1/4 cup all-purpose flour, 1 teaspoon salt, and a grind of black pepper. Mix well until evenly incorporated.
- Heat about 1/2 inch of oil in your skillet over medium heat—aim for 180°C (355°F). To test if the oil is hot enough, drop a small piece of batter; it should sizzle immediately and rise to the surface.
- Using a tablespoon or your hands, scoop out a portion of the batter and gently flatten it into a patty about 1/2 inch thick. Carefully place it in the hot oil, leaving space between each fritter.
- Fry for about 3–4 minutes per side. Look for a deep golden-brown color and a crackling sound when flipping. Adjust heat if browning too quickly or slowly.
- Once cooked, transfer fritters to paper towels to drain excess oil. Repeat with remaining batter, maintaining oil temperature. If oil smokes or smells burnt, reduce heat or start fresh with clean oil.
- Let fritters rest for 1–2 minutes before serving. For extra crunch, serve immediately with a squeeze of lemon or a dollop of sour cream.
Let the fritters rest briefly on paper towels to drain excess oil. Serve hot, garnished with herbs or lemon as desired. For best texture, eat within 20 minutes of frying.
How to Know It’s Done
- Fritters are golden and crispy on the outside, tender inside.
- A thin spatula should lift the fritter without breaking, indicating proper consistency.
- Oil temperature remains steady at 180°C (355°F) during frying—use a thermometer for accuracy.
Classic Potato Fritters
Ingredients
Equipment
Method
- Peel and grate the potatoes, then transfer them to a clean kitchen towel and squeeze out as much moisture as possible—this helps make the fritters crispy.
- Finely chop the onion and add it to a large mixing bowl along with the grated potatoes.
- Pour in the beaten eggs and sprinkle the flour, salt, and pepper over the mixture. Use a spoon or spatula to fold everything together until well combined and slightly sticky.
- Heat about half an inch of oil in your frying pan over medium heat until it shimmers and reaches approximately 180°C (355°F). You can test it by dropping a small spoonful of batter; it should sizzle immediately.
- Using a tablespoon or your hands, scoop out a portion of the batter and gently flatten it into a round patty about half an inch thick. Carefully place it into the hot oil, pressing down slightly.
- Fry the fritters for about 3–4 minutes on each side, until they turn deep golden brown and crispy. Adjust the heat if they brown too quickly or slowly.
- Once cooked, transfer the fritters to paper towels to drain excess oil. Continue frying the remaining batter in batches, maintaining the oil temperature.
- Serve the hot, crispy fritters immediately with a squeeze of lemon or your favorite dipping sauce for maximum flavor and crunch.
Pro tips for crispy potato fritters
- Use a coarse grater for a rustic texture and easier moisture release.
- Squeeze out as much moisture as possible from grated potatoes to avoid sogginess.
- Keep oil at a steady 180°C (355°F); too hot and the fritters will burn, too cool and they’ll be greasy.
- Flatten each fritter gently but firmly; uneven thickness affects cooking and crispiness.
- Fry in small batches to maintain oil temperature and crisp edges—crowding causes soggy results.
- Rest cooked fritters on paper towels briefly to absorb excess oil and keep them crunchy.
- Serve immediately for maximum crunch, but if needed, reheat in a hot oven (200°C/400°F) for 5 minutes.
Common mistakes and how to fix them
- FORGOT to squeeze out moisture → Use a towel to prevent soggy fritters.
- DUMPED too much flour → Add gradually until batter holds together without being stiff.
- OVER-TORCHED oil → Lower heat immediately to stop burning and continue frying.
- MISSED oil temperature check → Use a thermometer to keep consistent crispness.
Quick fixes and pantry swaps
- When fritters fall apart, splash a little more flour into the batter and gently reshape.
- If oil smoke appears, shield with a splatter guard and lower the heat immediately.
- Dumped too much salt? Rinse and pat dry before frying again for a less salty bite.
- Over-browned fritters? Patch with a quick sprinkle of lemon juice to brighten flavors.
- When oil shimmers but crackles less, rescue with a quick increase in heat for extra crispness.
Prep, store, and reheat tips
- Prep the grated potatoes and chopped onion ahead; keep in an airtight container in the fridge for up to 24 hours. Expect a slightly softer texture, but it still crisps up well.
- Fritters can be assembled and refrigerated for up to 4 hours before frying. Cover loosely to prevent drying out or absorbing fridge odors.
- Cooked fritters are best enjoyed fresh, but can be stored in an airtight container in the fridge for up to 24 hours. Reheat in a hot oven (200°C/400°F) for 5 minutes until crisp and sizzling.
- Reheating will soften the original crunch, so if you want crispiness, briefly pan-fry or oven-reheat, watching for that golden shimmer and crackle.
Top questions about potato fritters
1. Can I use different potatoes?
Use starchy potatoes like Russets for the best fluffy texture and crispy edges. Yukon Golds can add a creamier inside.
2. Can I make these without eggs?
Yes, adding a pinch of baking powder can help make them a bit lighter, but don’t overdo it or they’ll be airy and fall apart.
3. How hot should the oil be?
Keep the oil at around 180°C (355°F) for crispiness. Too hot and they burn; too cold and they absorb oil.
4. Why do my fritters turn out greasy?
Fry in small batches to prevent temperature drops, which can make fritters greasy and soggy.
5. Can I prepare the potatoes ahead?
Yes, you can refrigerate grated potatoes in water for up to 24 hours; drain and dry thoroughly before mixing.
6. How do I reheat leftover fritters?
Reheat in a hot oven (around 200°C/400°F) for 5 minutes to regain some crispness. Avoid microwave which makes them soggy.
7. Can I customize the flavor?
Add chopped herbs, garlic, or cheese into the batter before frying for extra flavor and variety.
8. Why are my fritters soggy?
Ensure you squeeze out as much moisture as possible from the grated potatoes; excess moisture makes fritters soggy.
9. How do I flip the fritters without breaking them?
Use a slotted spoon or spatula to flip them carefully, avoiding breakage and ensuring even browning.
10. How do I know when they’re ready?
The fritters are done when they’re deep golden, crispy on the outside, and feel firm when pressed lightly.
These potato fritters bring back that cozy, familiar aroma of Sunday mornings and lazy afternoons. They’re simple to make but full of personality, especially when served hot and crispy right from the pan.
In a world of fast food, this old-school comfort still holds up. They’re perfect for sharing, for nostalgic moments, or just because you crave that perfect crunch and tender bite—no matter the season.

Welcome to Exploreing New Tastes. I’m really glad you found your way here. I’m a food blogger driven by curiosity more than perfection. I think about flavors constantly, how they change across cultures, how a small tweak can completely shift a dish, and how food tells stories long before anyone sits down to eat. This blog is where I document that curiosity, one recipe and one experience at a time.