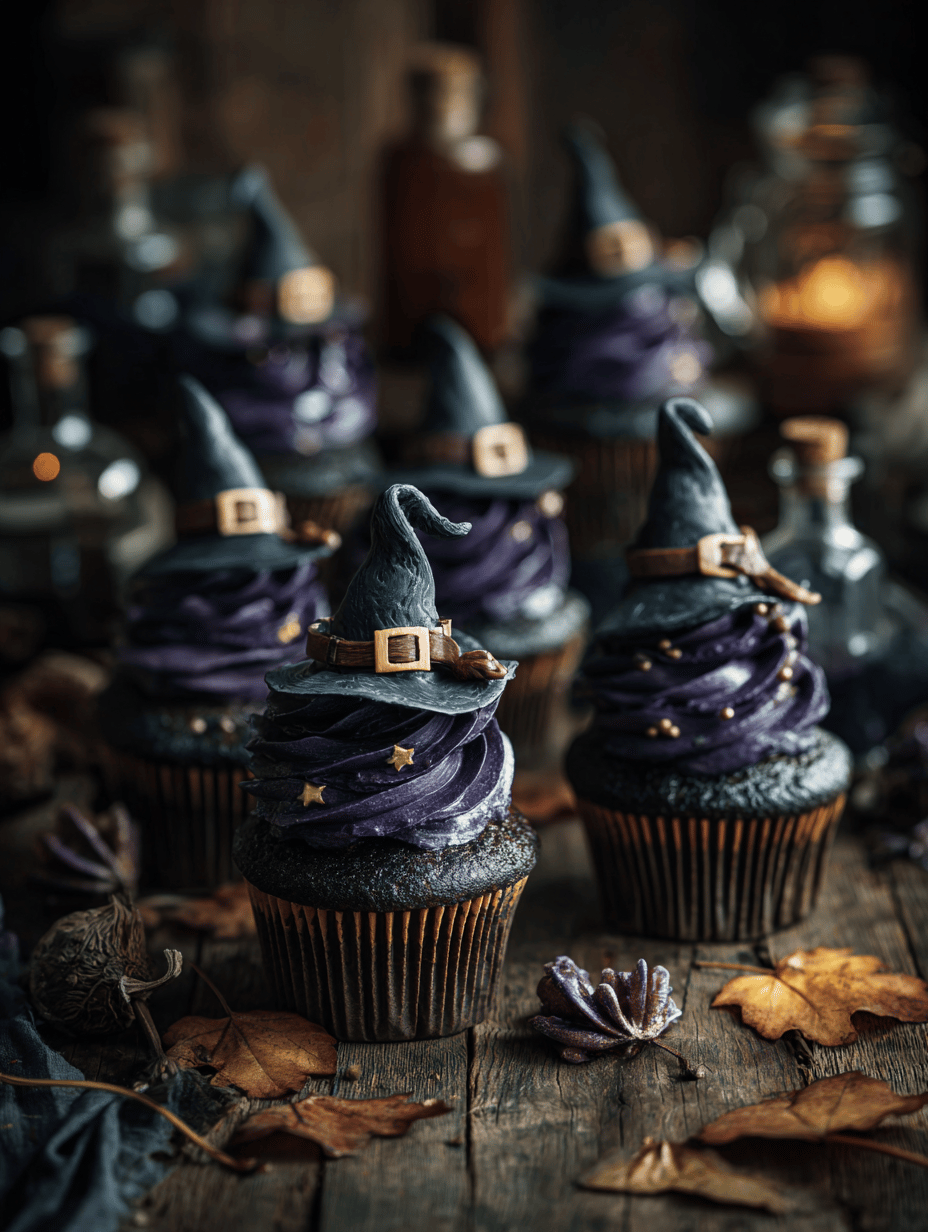
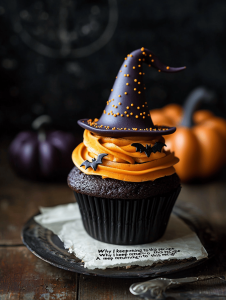
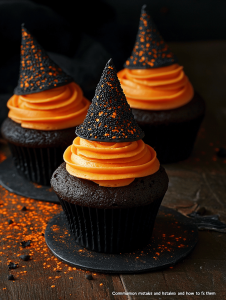
There’s a weird thrill in turning ordinary cupcakes into tiny witch hats. It’s a project that feels both playful and slightly chaotic, perfect for late October or a themed party. I love how the process invites a bit of messy joy—spreading icing, piping little loops, and stacking bits of candy.
Why I keep returning to this recipe
It’s a simple way to add a dash of creativity and chaos to my kitchen. The process feels like a mini craft project, and the end result always impresses. Plus, it’s perfect for sharing—kids love them, adults get a kick out of the spooky vibe. They’re a reminder that baking can be playful, messy, and totally rewarding.
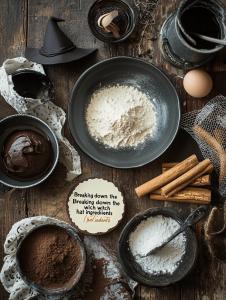
Breaking down the witch hat ingredients
- Dark chocolate or black icing: For the hat itself, rich and slightly bitter. Swap with dark cocoa powder and butter for a homemade version.
- Colorful candies or gumdrops: Tiny accents that mimic jewels or bands. Use sour belts for a tangy surprise.
- White icing or buttercream: Base for the hat’s brim and decorations. Cream cheese frosting works well too.
- Sprinkles or edible glitter: Add some shimmer to make the hat stand out in the dark. Choose non-sugar options for a more matte look.
- Food-safe black gel or edible ink: To draw or add details. Substitute with black cocoa powder if you want a more natural look.
- Candy eyes or mini chocolate chips: For spooky accents or tiny buttons. Always a crowd-pleaser.
Tools you’ll need for witch hat cupcakes
- Muffin tin: To bake the cupcakes evenly.
- Mixing bowls: Combine ingredients smoothly.
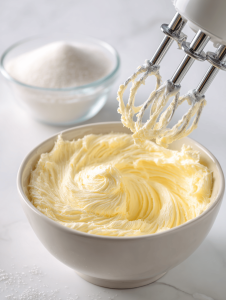
- Electric mixer or whisk: Cream butter and sugar properly.
- Piping bag with small round tip: Create the hat bands and decorations.
- Cooling rack: Cool cupcakes without sogginess.
Step-by-step to Witch Hat Cupcakes
Step 1: Preheat your oven to 180°C (350°F).
Step 2: Line a muffin tin with paper liners or grease lightly.
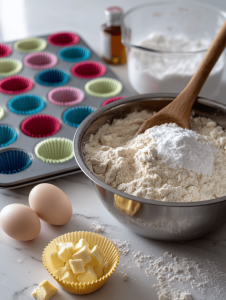
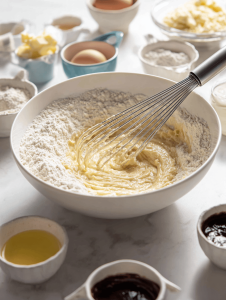
Step 3: Mix your dry ingredients: flour, baking powder, a pinch of salt.
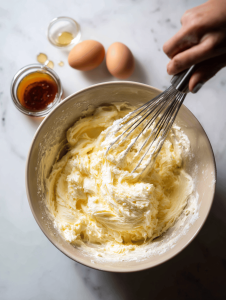
Step 4: Cream butter and sugar until fluffy, about 3 minutes.
Step 5: Add eggs one at a time, beating well after each.
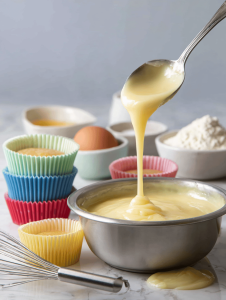
Step 6: Stir in vanilla extract and milk to loosen the batter.
Step 7: Fill cupcake liners about 2/3 full with batter.
Step 8: Bake for 18-20 minutes, until golden and a toothpick emerges clean.
Step 9: Let cool completely before decorating.
Cooking checkpoints and tips
- Batter should be smooth and free of lumps.
- Cupcakes should be golden around the edges, not pale.
- Toothpick test: insert in the center, it should come out clean.
- Ensure cupcakes are fully cooled before adding the hat decoration.
Common mistakes and how to fix them
- Cupcakes are raw inside.? UNDER-BAKED. Cupcakes look pale and feel soft.→ Bake an extra 2-3 mins, check with toothpick.
- Too dark or burnt edges.? OVER-BURNED. Tops turn dark quickly.→ Cover with foil, reduce oven temp to 160°C (320°F).
- Poor adhesion of icing.? DECORATION SLIDES OFF. Icing melts or slips.→ Chill decorated cupcakes 10 mins before serving.
- Lumpy batter.? BATTER IS LUMPY. Not smooth enough.→ Sift dry ingredients, mix gently.
Witch Hat Cupcakes
Ingredients
Equipment
Method
- Preheat your oven to 180°C (350°F) and line a muffin tin with paper liners.
- In a mixing bowl, whisk together the flour, sugar, and a pinch of salt until well combined.
- In another bowl, beat the softened butter until creamy, then add eggs one at a time, mixing well after each addition, until the mixture is smooth and fluffy.

- Stir in vanilla extract and milk gradually, mixing until the batter is smooth and slightly runny.
- Divide the batter evenly among the cupcake liners, filling each about two-thirds full.
- Bake for 18-20 minutes, or until the cupcakes are golden around the edges and a toothpick inserted in the center comes out clean.
- Remove the cupcakes from the oven and let them cool completely on a cooling rack before decorating.
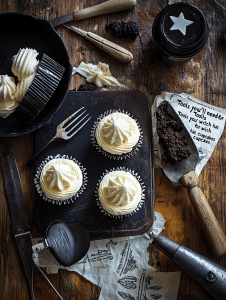
- Use a piping bag fitted with a small round tip to pipe a cone-shaped dollop of dark chocolate or black icing on top of each cooled cupcake, shaping it into a tiny hat.
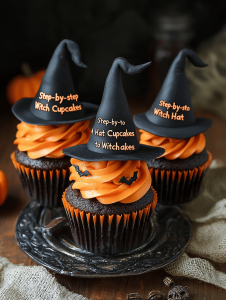
- Decorate the brim of each hat with white icing or buttercream, spreading it gently around the base of the cone.
- Place tiny candies or gumdrops at the base or top of the hat for colorful accents, and add sprinkles or glitter for shimmer.
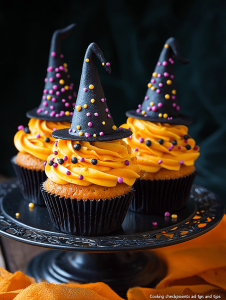
- Use black gel or edible ink to draw small details on the hat, such as bands or spooky designs, for extra flair.
- Finish each witch hat with candy eyes or mini chocolate chips for spooky buttons, and then serve these adorable treats to wow your guests!

Welcome to Exploreing New Tastes. I’m really glad you found your way here. I’m a food blogger driven by curiosity more than perfection. I think about flavors constantly, how they change across cultures, how a small tweak can completely shift a dish, and how food tells stories long before anyone sits down to eat. This blog is where I document that curiosity, one recipe and one experience at a time.